
Christmas Creations: How to Make a Homemade Advent Calendar
The countdown to Christmas is on! We all love counting down until the big day with an advent calendar, but have you ever thought about making your own? Filled with small surprise gifts and personal touches, your very own handmade calendar is perfect for putting an individual spin on a collective cultural tradition. Plus, it’s a super-sweet way to show your loved ones you care. All you need to bring our unique Advent calendar idea to life are a few Christmas tree branches and a few arts-and-crafts or wrapping materials that you may well already have hanging around the house! Follow our step-by-step guide and make a Christmas creation like no other -- a perfect addition to your festive decorations!

What do you need to create your own Advent calendar?
• A fine branch, wooden stake, or bean pole
• A few Christmas tree branches
• Brown paper or wrapping paper
• Natural and coloured string
• Labels
• Christmas-themed stamps and ink (optional)
• Marker pens
• Nylon thread
Step 1: Prepare your parcels
1) First off, prep your 24 presents! Select your little gifts, with those who are destined to open them in mind. It’s up to you how big or small these gifts are, and you can adapt them to your budget accordingly. Some ideas include chocolates, sweets, sports accessories and games, a poem, Christmas decorations, or even what you’d usually buy as a stocking filler – things like socks or gloves, for example. To achieve a less-uniform and more natural look, it’s ideal to vary the shapes and sizes of your parcels. While this may mean selecting a couple of larger and more special items – why not check out our Christmas Gift Ideas for some inspiration – you could just vary your packaging, adopting a pass-the-parcel wrapping method (using a big box to conceal a much smaller gift). Just remember that you’ll want to avoid anything that’s too heavy or voluminous, as your branch needs to support each parcel’s weight!
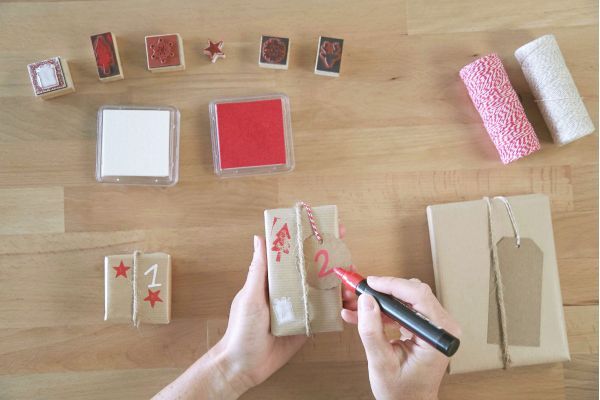
2) Once the content of your 24 parcels is good to go, it’s time to wrap them up! Opt for whatever look you fancy, but prioritise recyclable materials. We prefer using brown kraft paper and natural twine or string, keeping to a theme of red, white and brown.
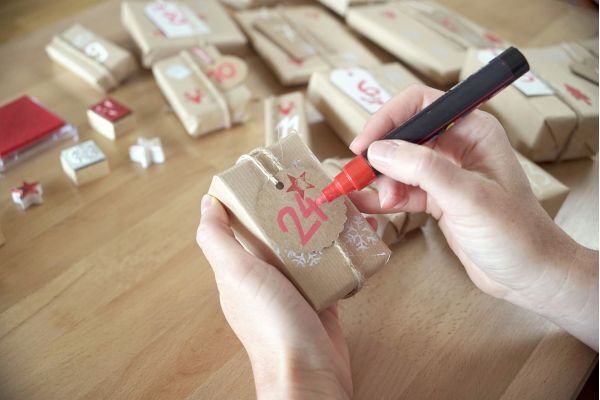
3) Next, decorate each parcel and write a number on each of them, from 1 to 24. On a few parcels, you can add labels and some coloured string to vary the overall look. Using stamps if you’ve got some, or any other type of decoration, embellish your parcels and add some twinkling touches, in keeping with the Christmas theme.
Step 2: Attach the parcels to the branch
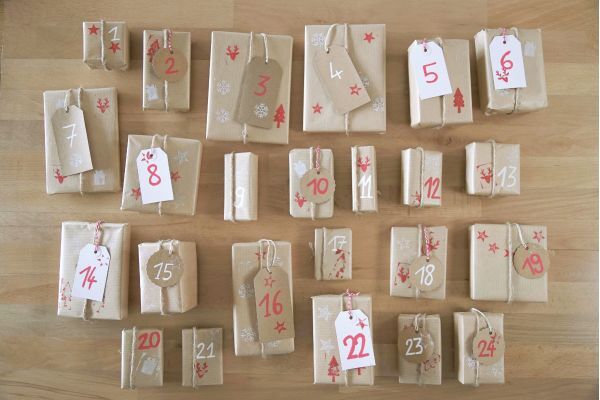
1) Before fixing the parcels to the branch, stake, or bean pole, try to map out how and where you are going to position each of them, by laying them out on the floor or on a table. Play around with them until they’re suitably spaced, in terms of their size and their distance from the beam. Make sure the numbers are all mixed up too, ensuring there’s enough of a challenge when it comes to finding the right number and giving thought to the resulting look when parcels are removed one by one as Christmas day nears. The trick is to think about how to keep your branch balanced as the parcels slowly disappear.
2) You can now attach each parcel to the branch or wooden stake using the string. First tie a knot in the string that will sit directly behind the branch. Then, tie the other end of the string to the string already wrapped around your parcel. Don’t tie knots that are too tight or complex – they need to be easy enough to untie when each parcel is removed, day after day in the run up to Christmas.
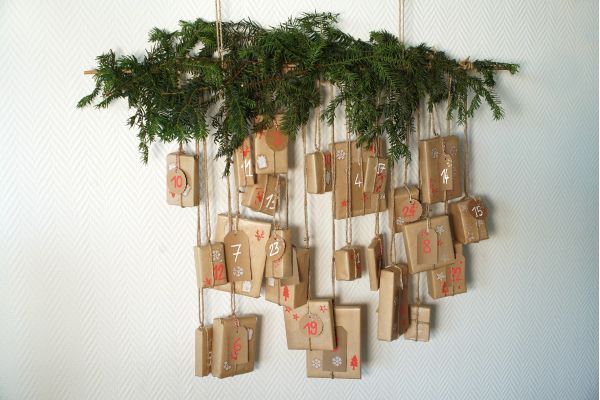
3) To polish things off, fix a few Christmas tree branches to the main branch or wooden stake using nylon thread. This almost-invisible thread will let you attach the elements together discreetly! The idea is to hide all the knots that attach your 24 parcels to the branch, for a nice clean finish!


Ready for Advent!
And there you go – your very own advent calendar is ready! All that’s left to do is to hang up your DIY creation and countdown until the 25th!