
How to Make a Raised Garden Bed
Want a raised plant bed in your garden? Fancy a spot of DIY? Rather than buying an elevated planter, why not make one yourself? Whether your intention is to transform a corner of your patio into a luscious green landscape, grow vegetables in a contained space, or simply to eliminate the need to bend down when gardening, this guide is for you… Here’s how to create your own made-to-measure raised garden bed in an upcycling-friendly manner, using reclaimed or salvaged wood.
Required materials: prepare what you need
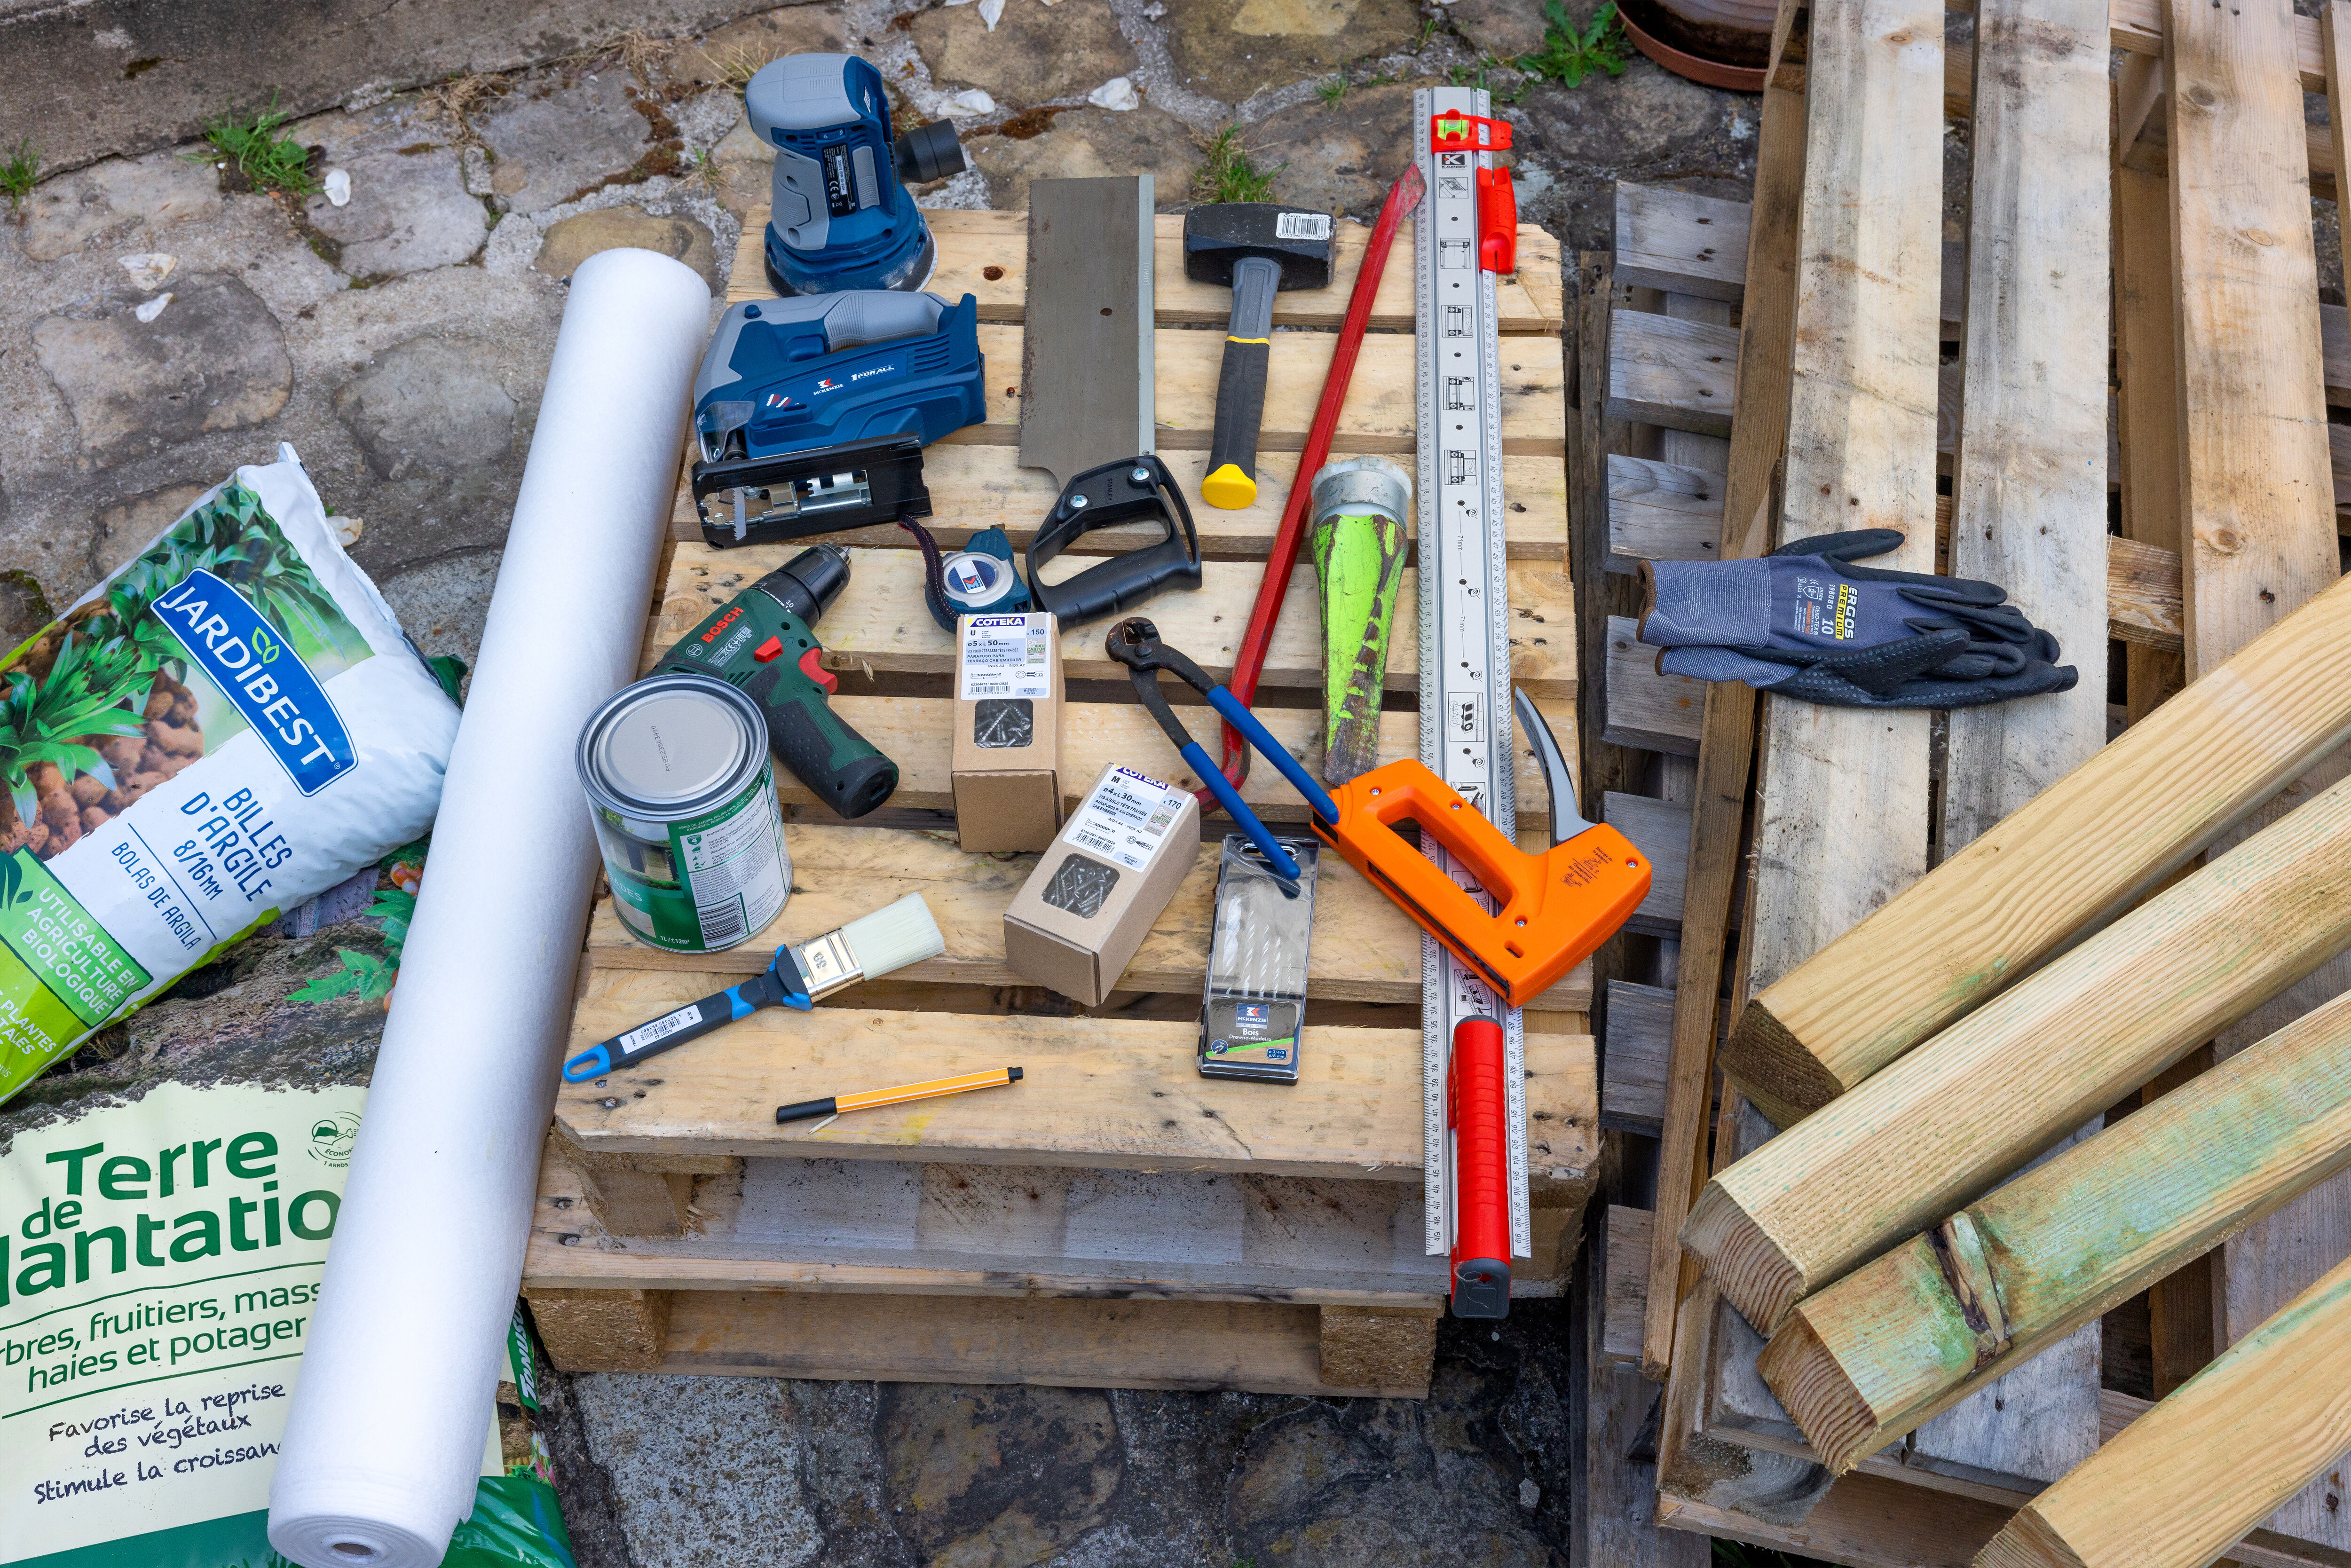
Pieces of wood:
• 3 or 4 reclaimed or salvaged wooden pallets
• 4 square posts
Tools :
• An electric jigsaw
• A wireless drill
• A wireless screw-gun
• A sander
• A crowbar
• A chisel or log splitter
• A mallet
• A hammer
• A hand saw
• Pliers
• 3 or 4 reclaimed or salvaged wooden pallets
• 4 square posts
Tools :
• An electric jigsaw
• A wireless drill
• A wireless screw-gun
• A sander
• A crowbar
• A chisel or log splitter
• A mallet
• A hammer
• A hand saw
• Pliers
Accessories and hardware:
• Wood screws
• Wood drill bits
• Metre tape measure
• A pencil
• A mitre box
• A metal ruler
• A pair of scissors
Additional kit :
• A pair of DIY work gloves to protect you from splinters
• A paint brush
• 1 pot of wood stain
• 1 roll of geotextile fabric
• A bag of compost
• A bag of clay balls
• Wood screws
• Wood drill bits
• Metre tape measure
• A pencil
• A mitre box
• A metal ruler
• A pair of scissors
Additional kit :
• A pair of DIY work gloves to protect you from splinters
• A paint brush
• 1 pot of wood stain
• 1 roll of geotextile fabric
• A bag of compost
• A bag of clay balls
Practical information: drawing up a plan for your raised garden bed, using our model plan
Use the model plan indicated below and, dependent on the space and type of wooden boards or pallets you have available, adapt it to suit the desired layout and size of your own raised garden bed.
.jpg)
Project time frame
A raised garden bed should take anywhere between a half-day and full day to build. The time taken ultimately depends on the equipment you have available (that may differ from our own examples) and whether you have help on hand or are working alone.
Assembling your raised garden bed, step by step
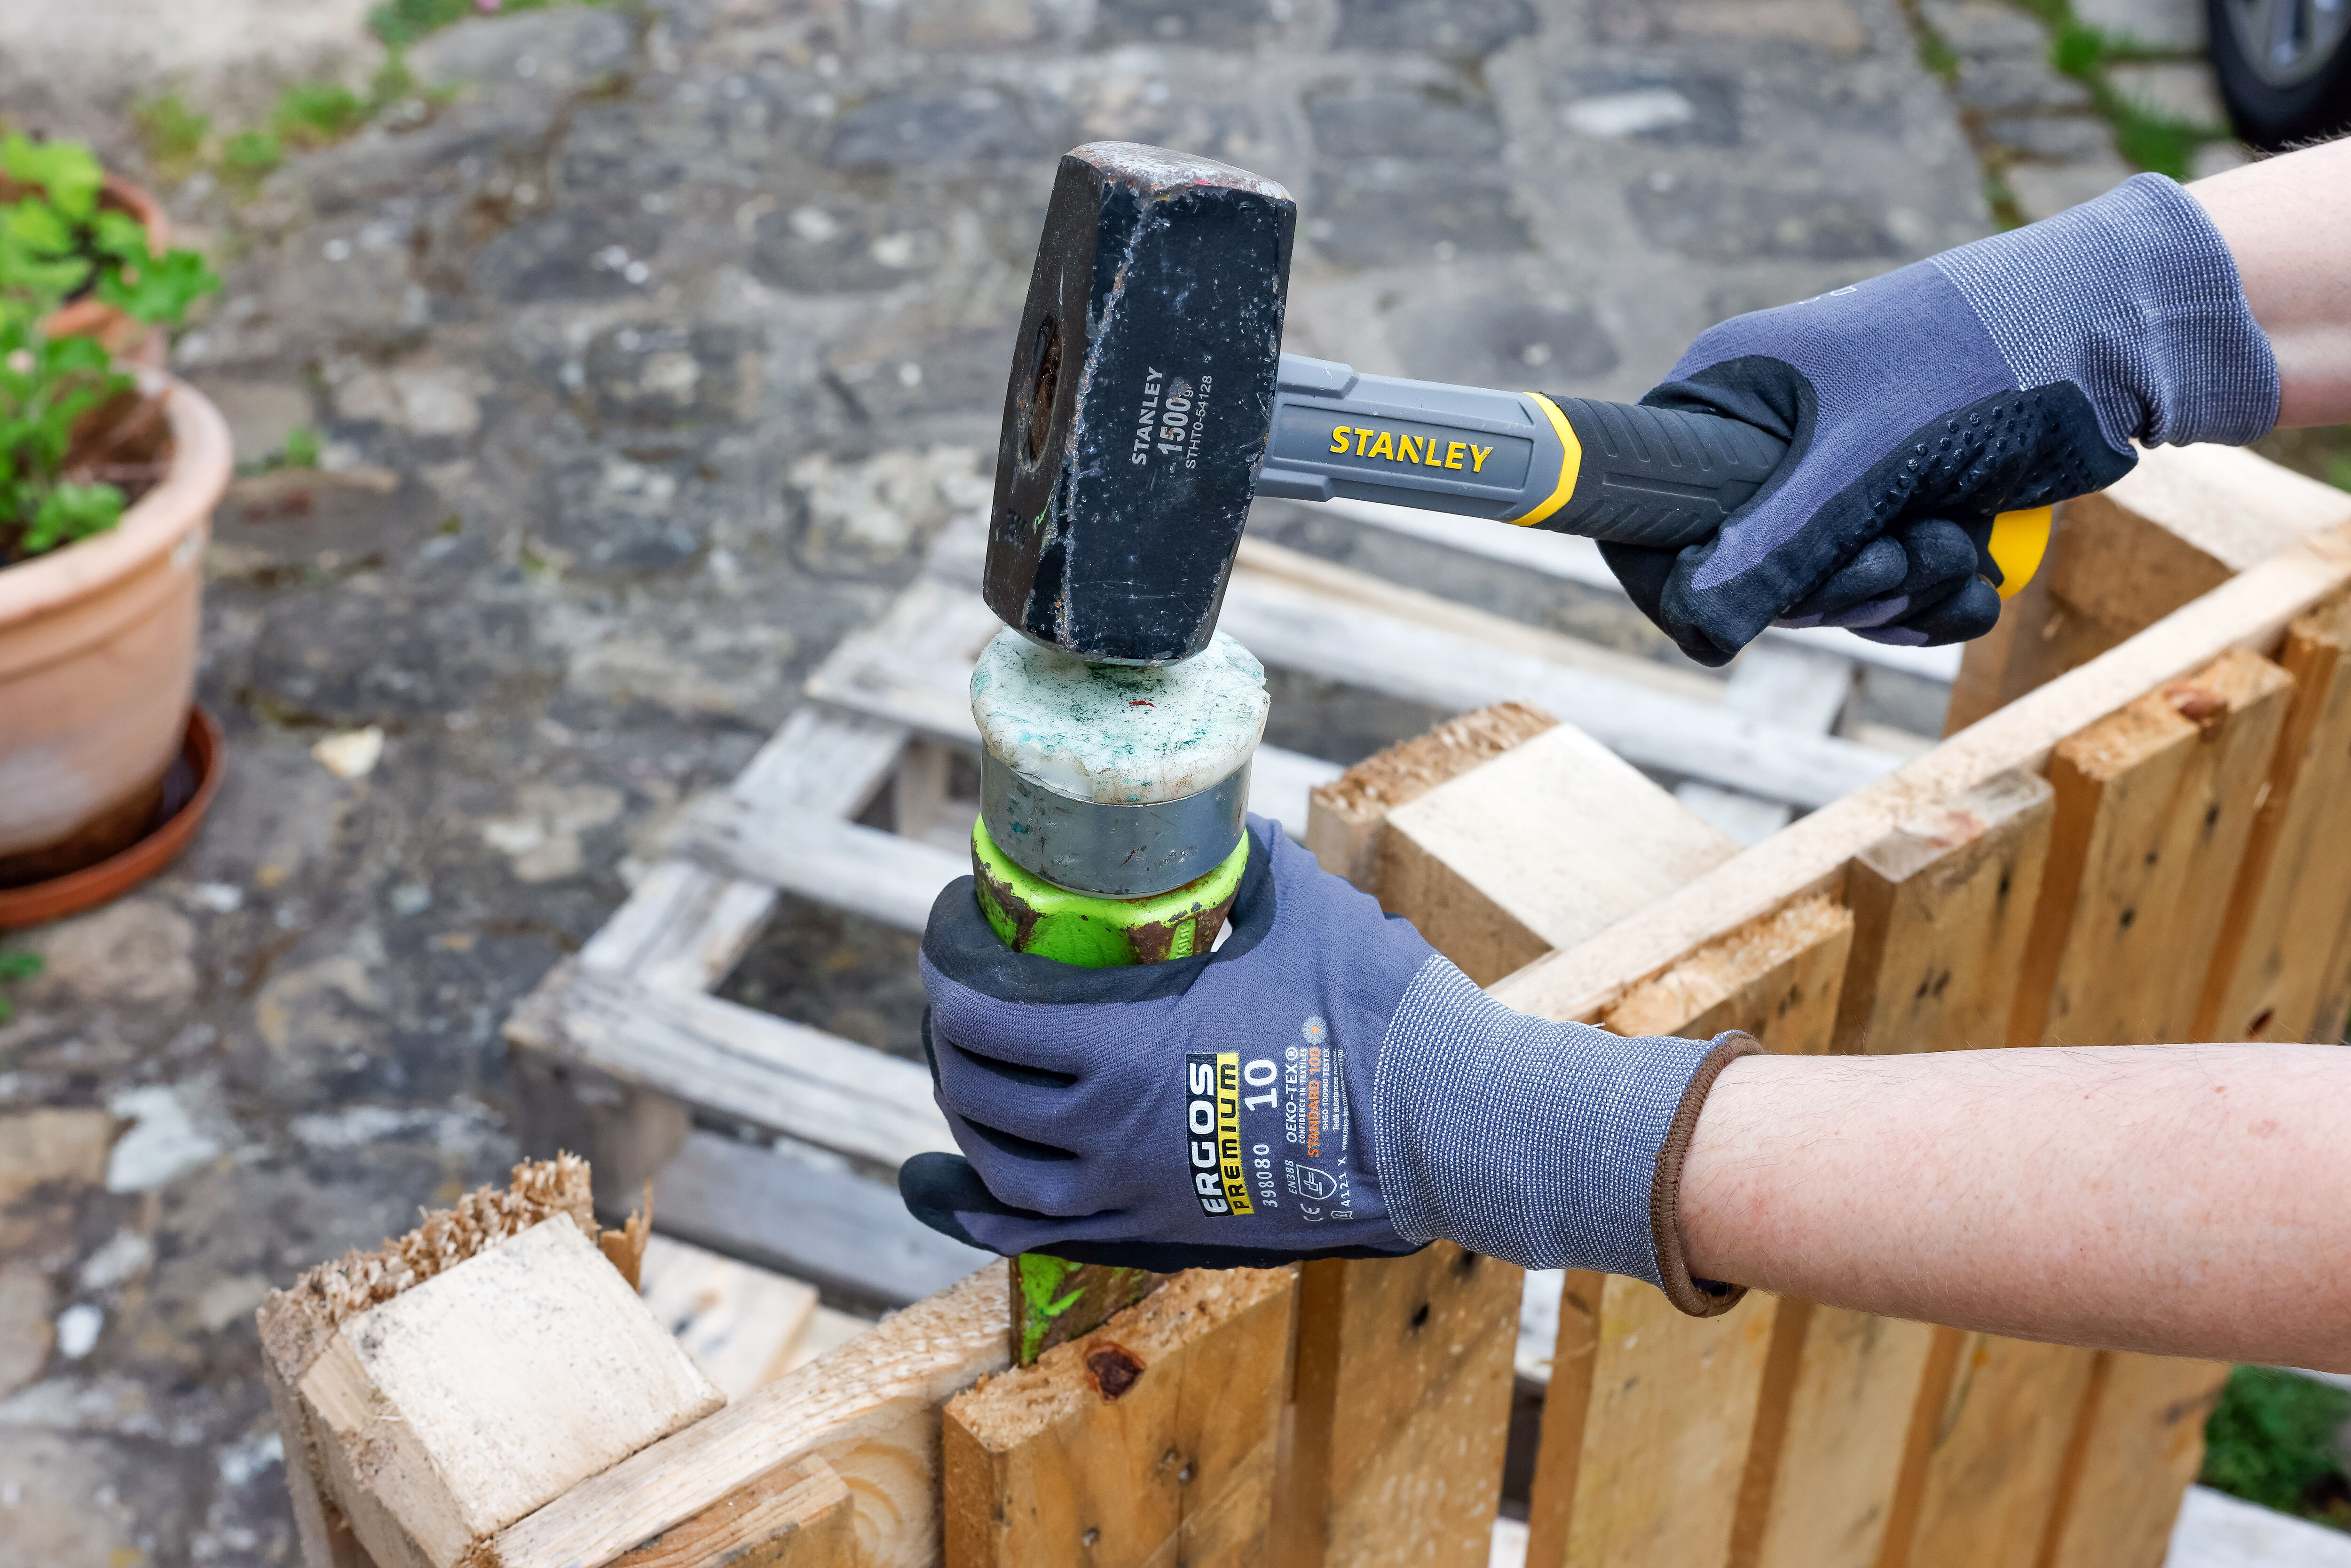

1) Separate the wooden boards from the palettes using a chisel (or log splitter) and crowbar.

2) Remove any old nails attached to your wooden boards.
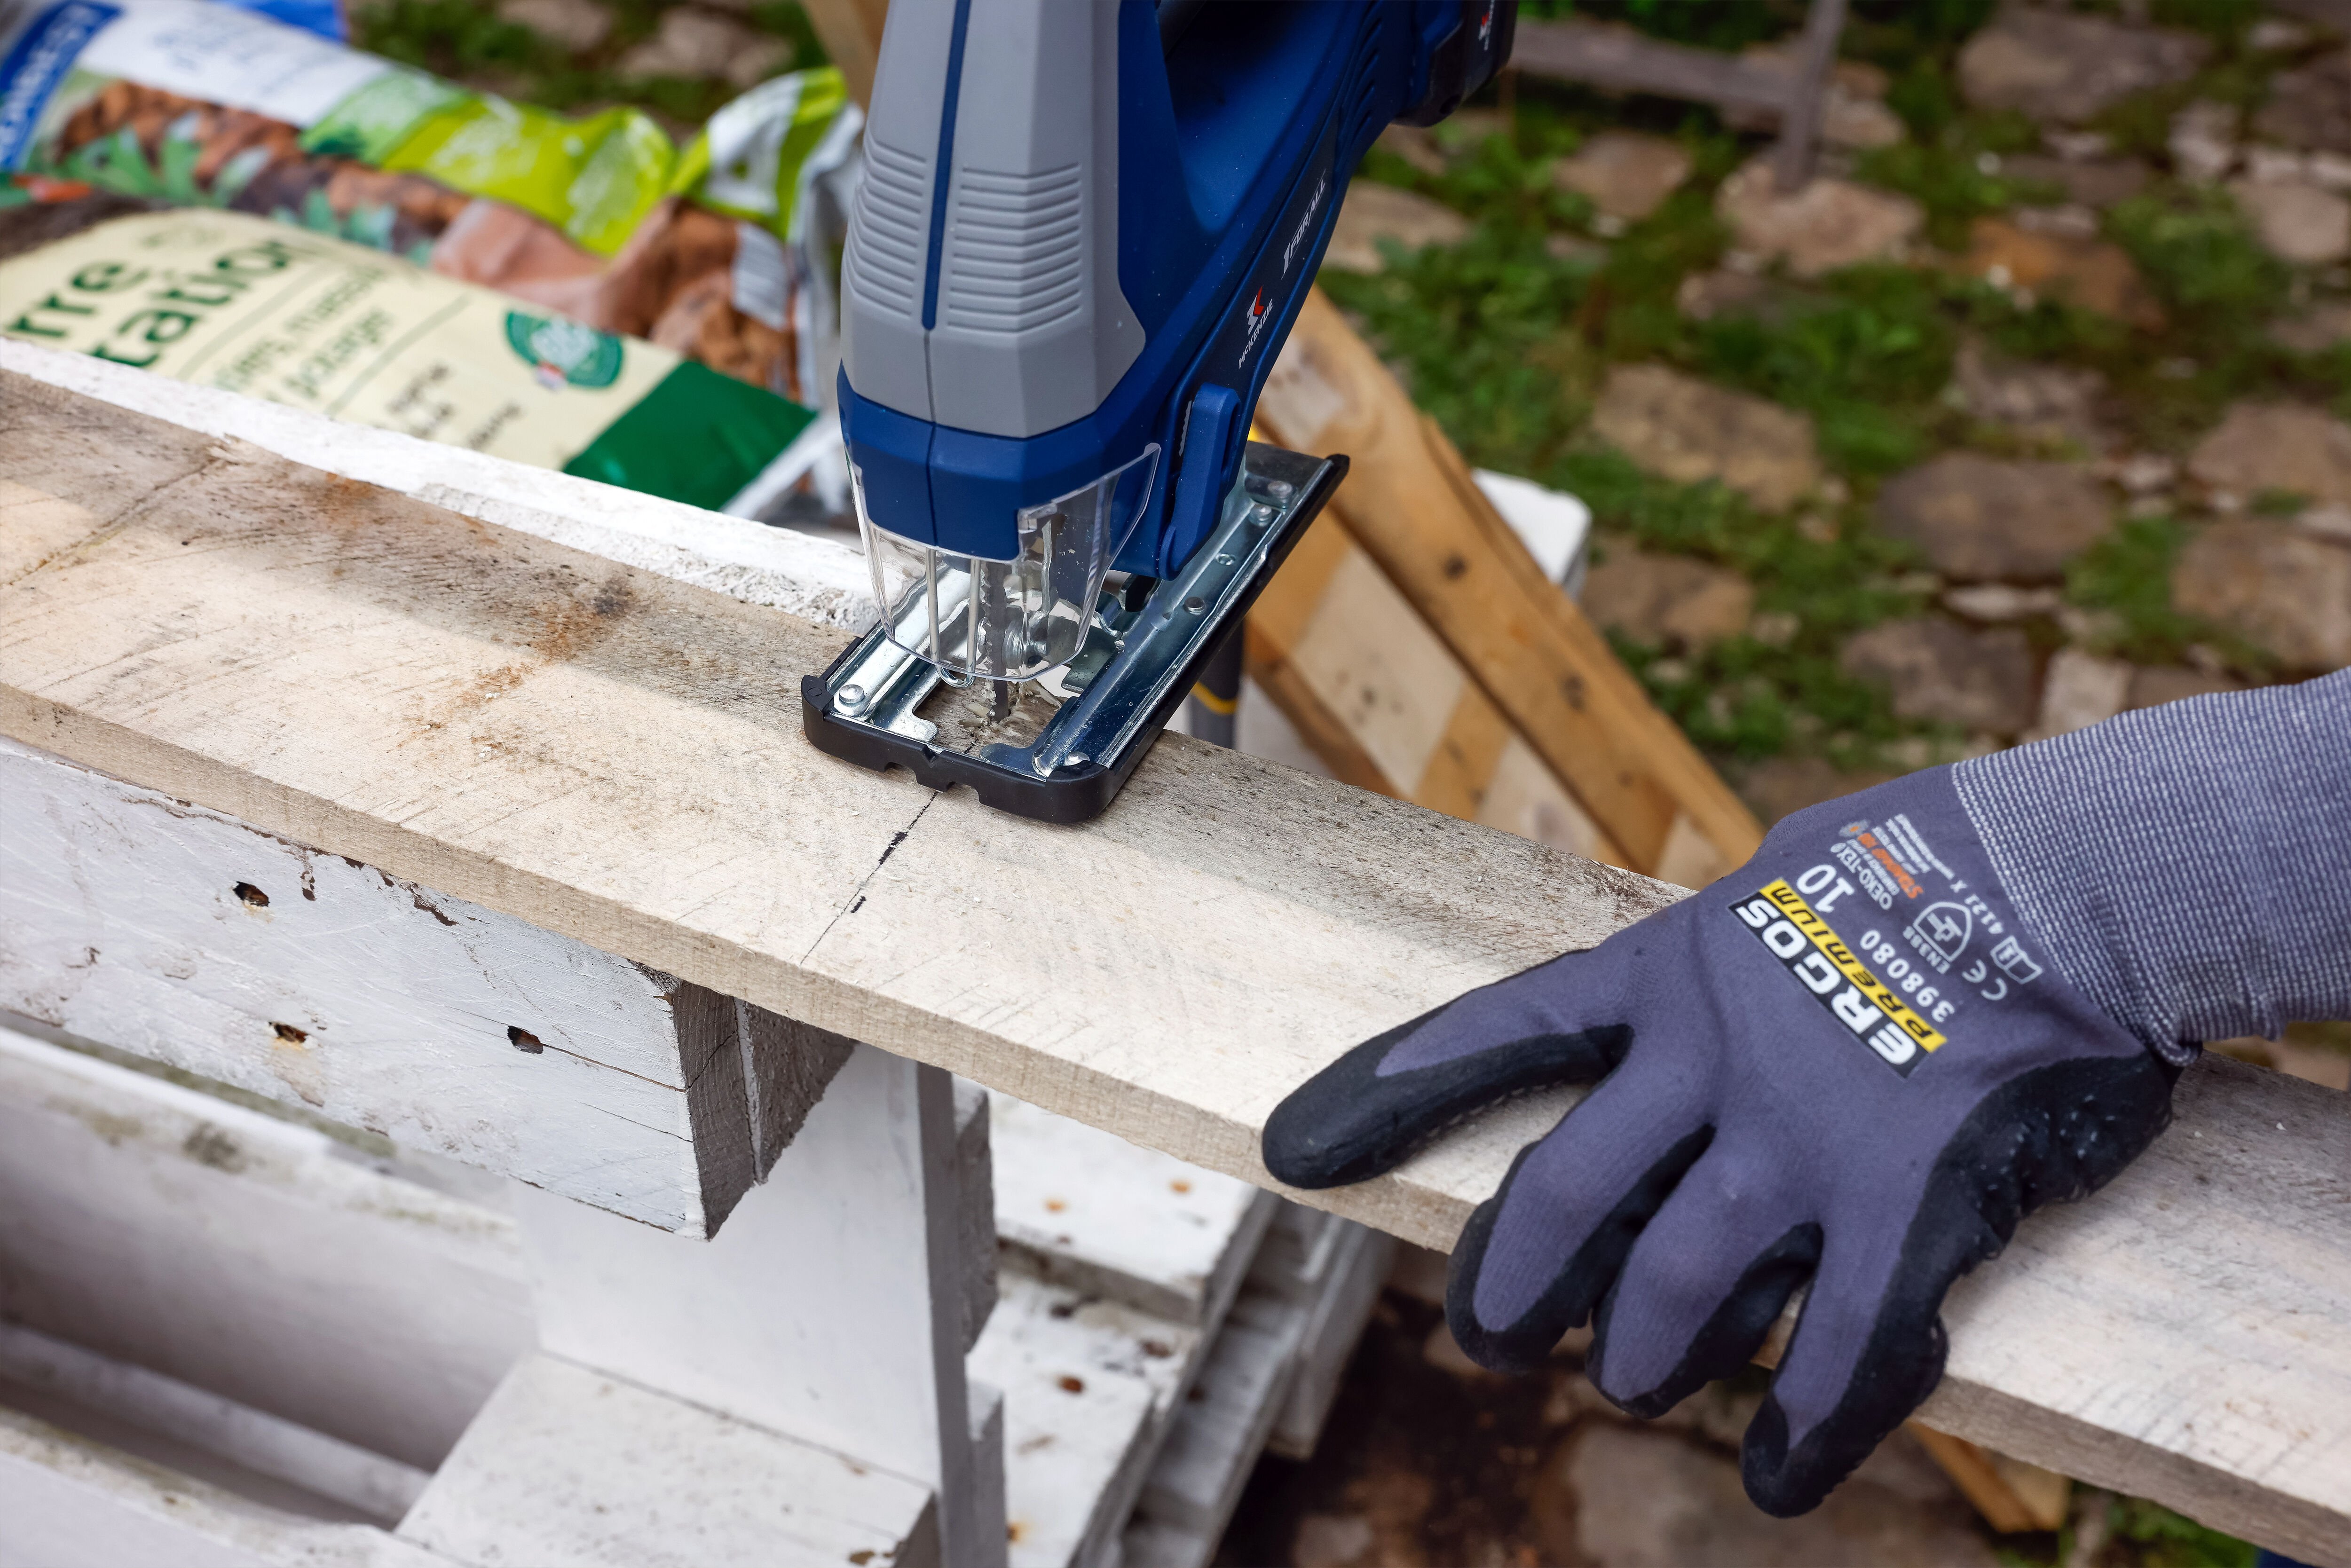
3) Chop your side boards, following the plan above or your own adapted plan.
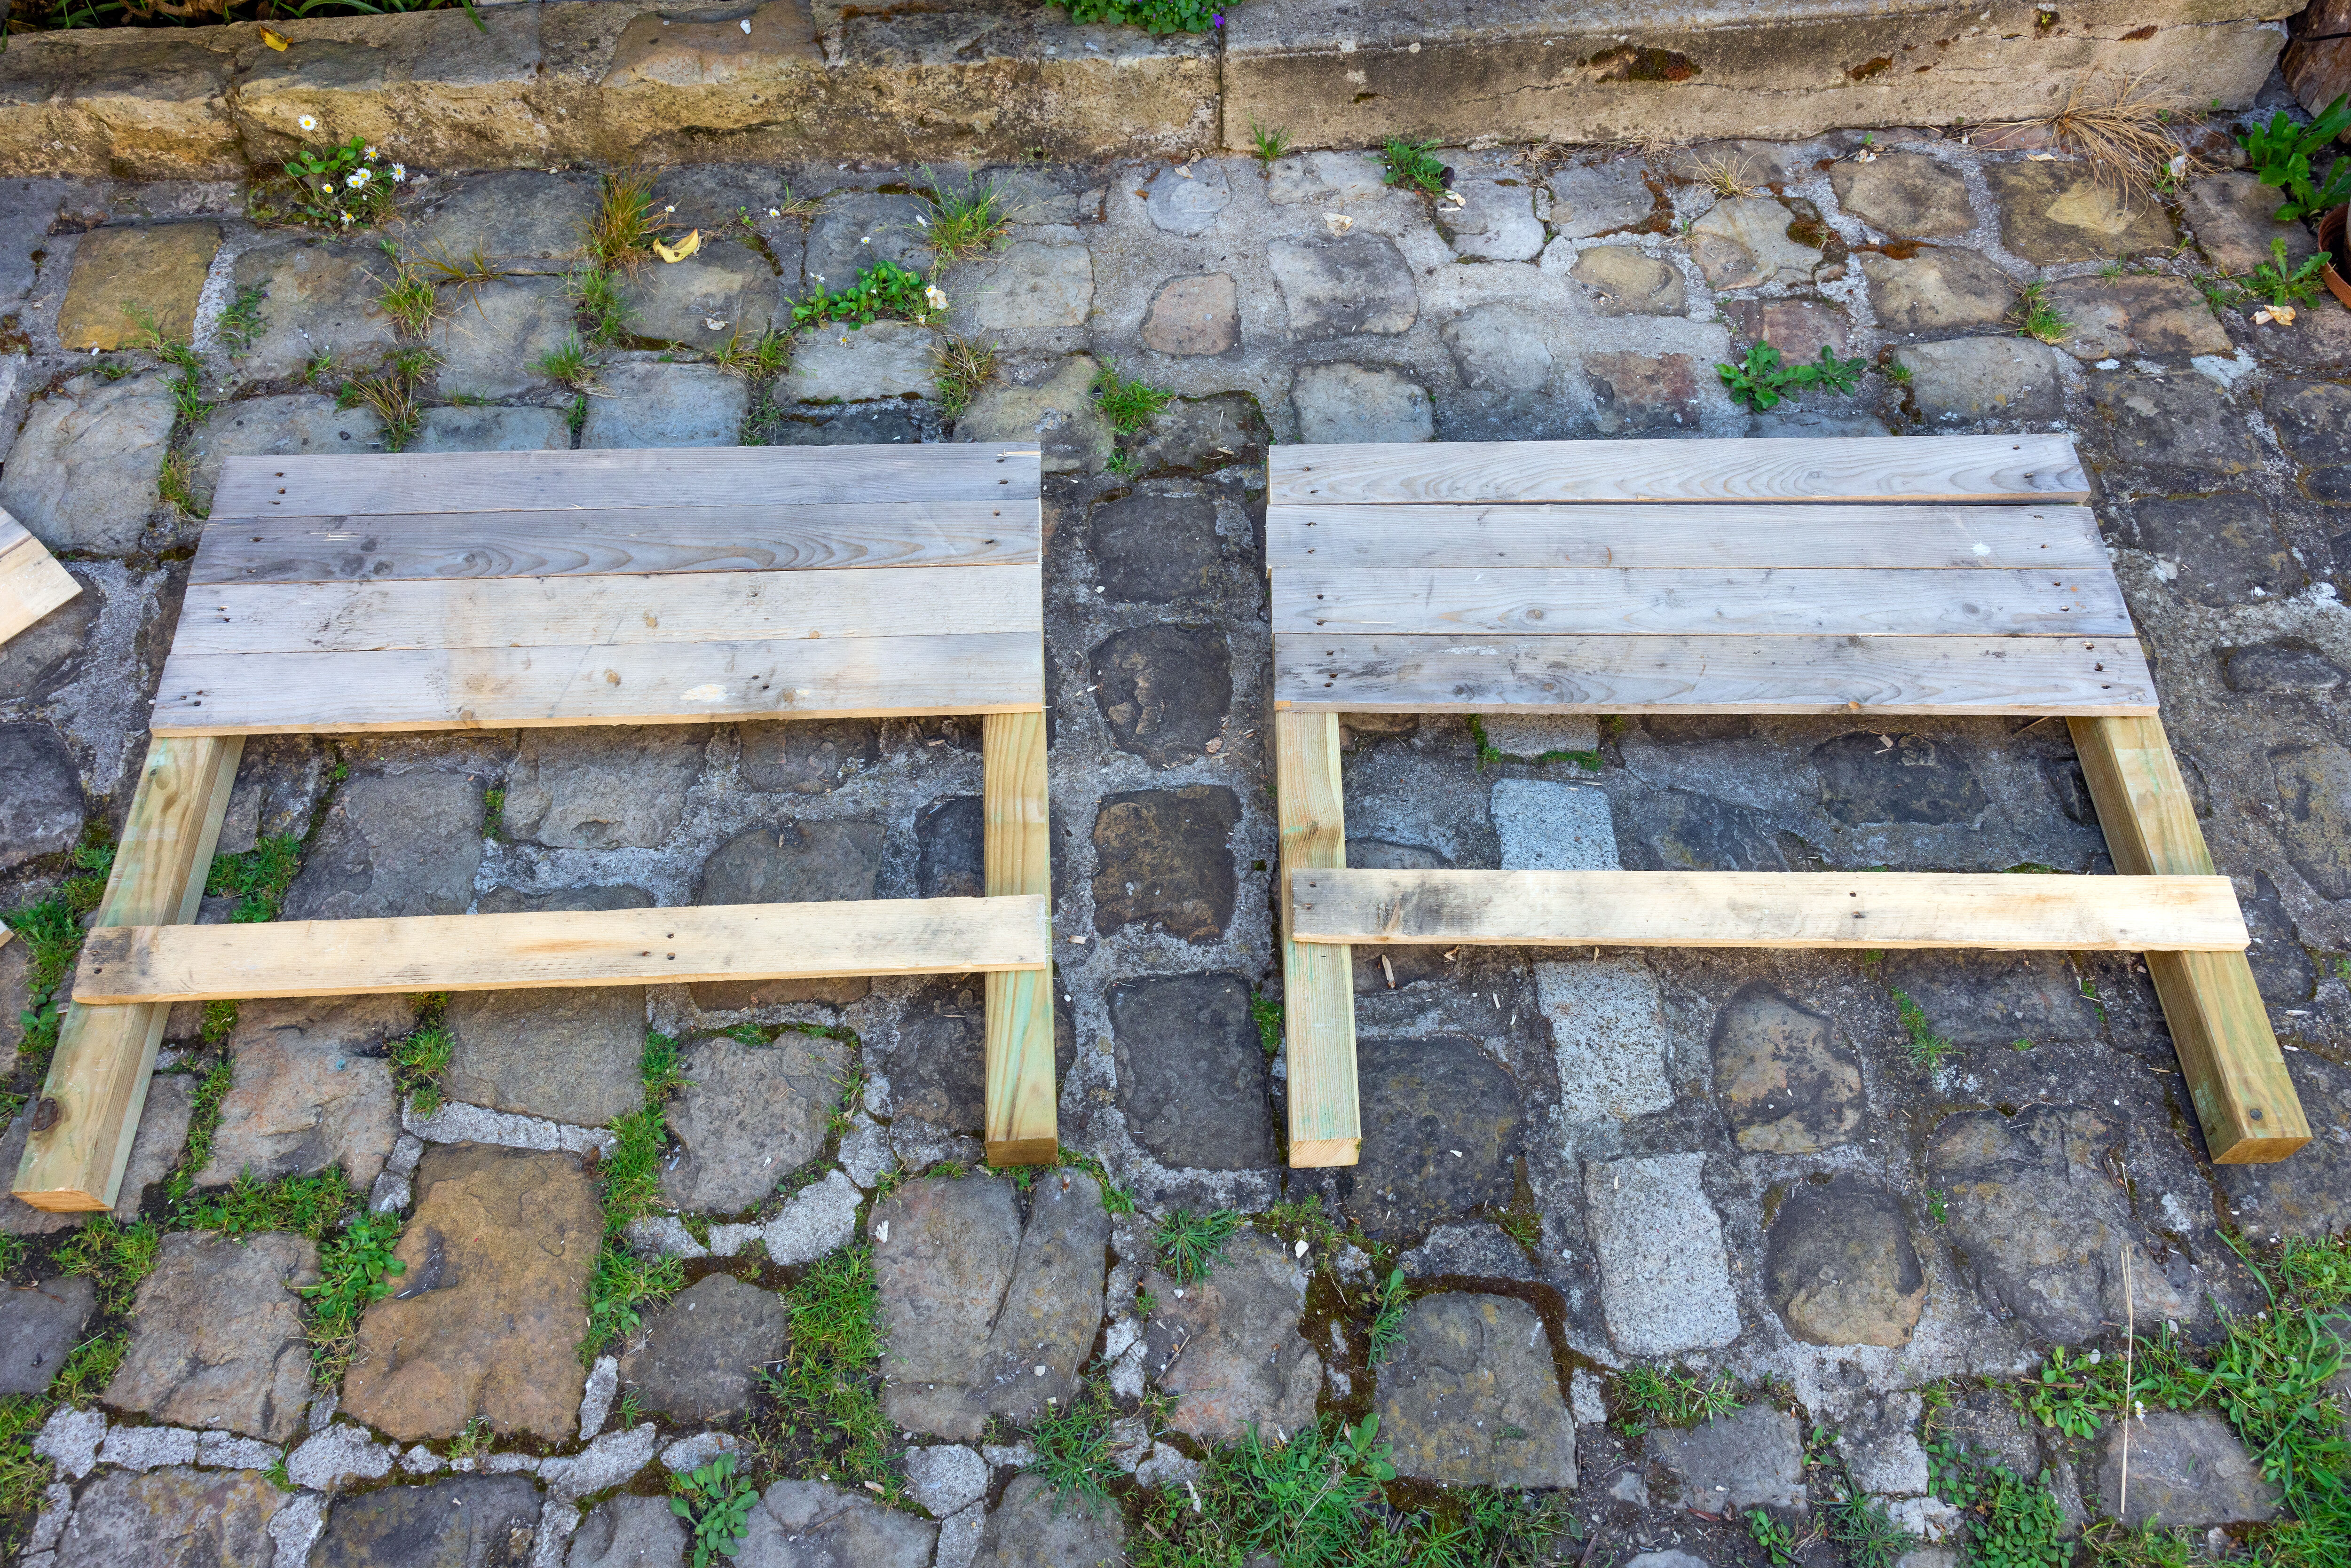

4) On the ground, lay out both ends of your raised garden bed, positioning the boards exactly how you intend to assemble them together.
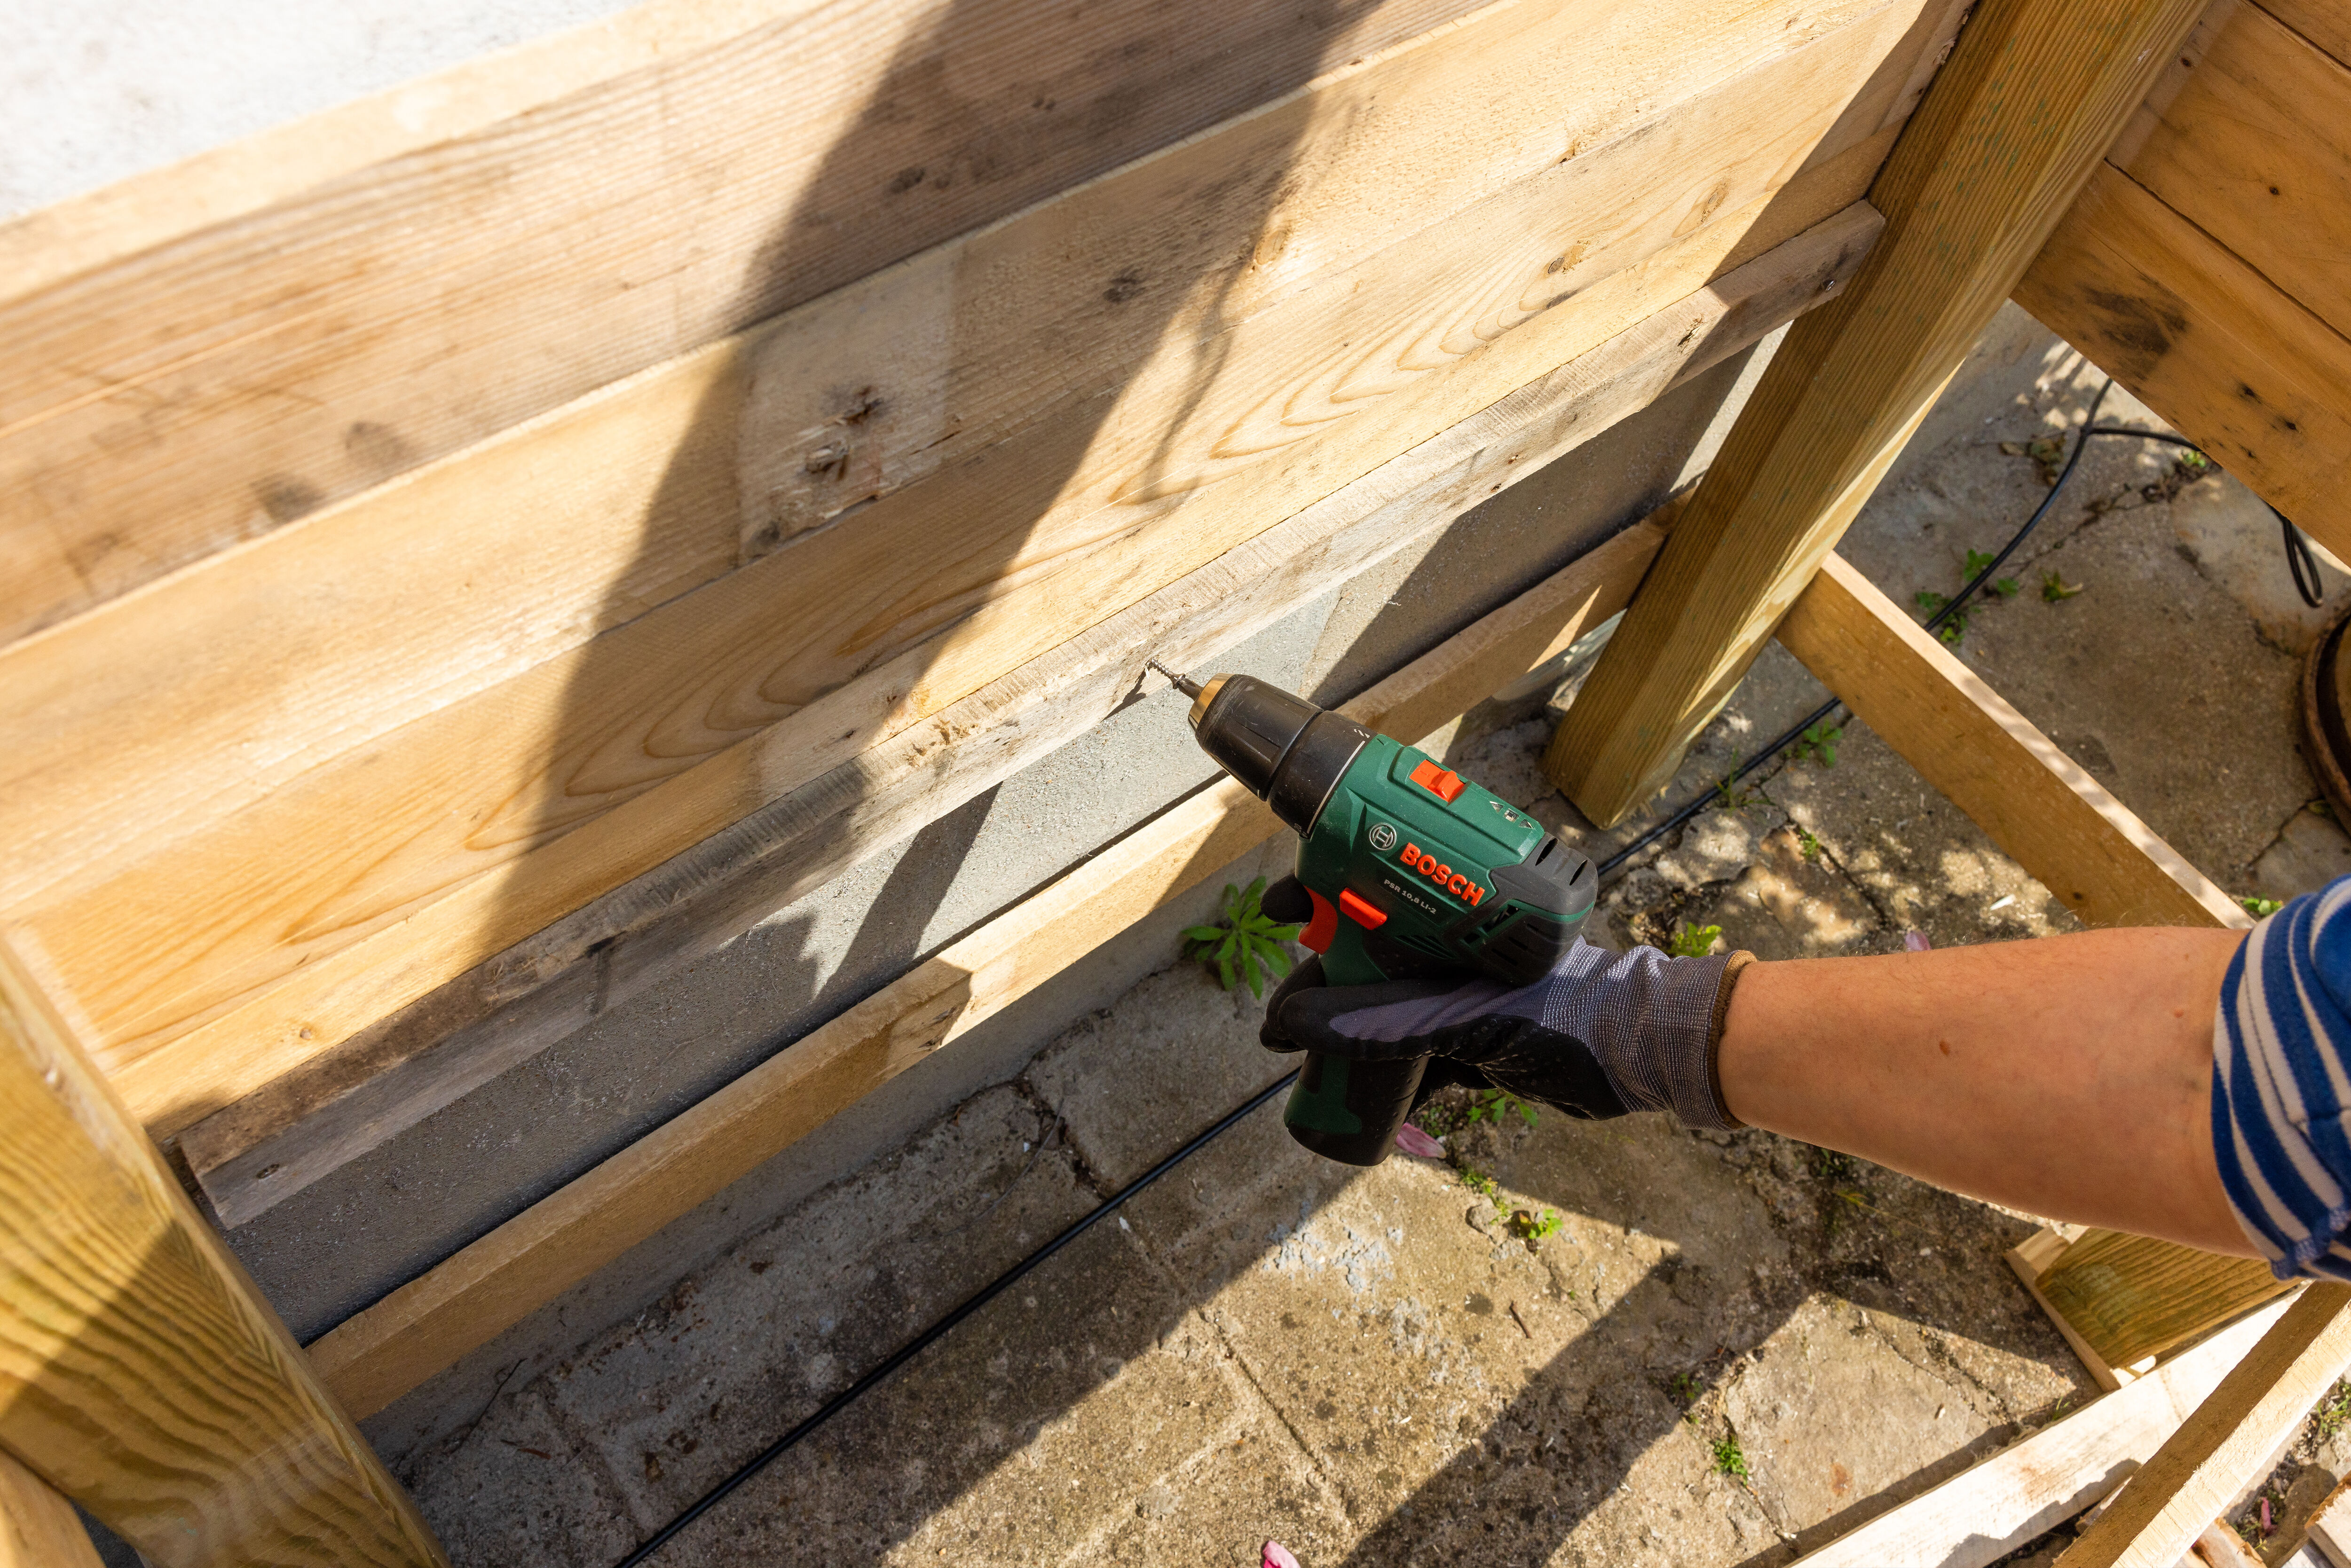
5) Drill the boards using a wood drill bit before screwing in any screws, as this prevents the wood from splitting
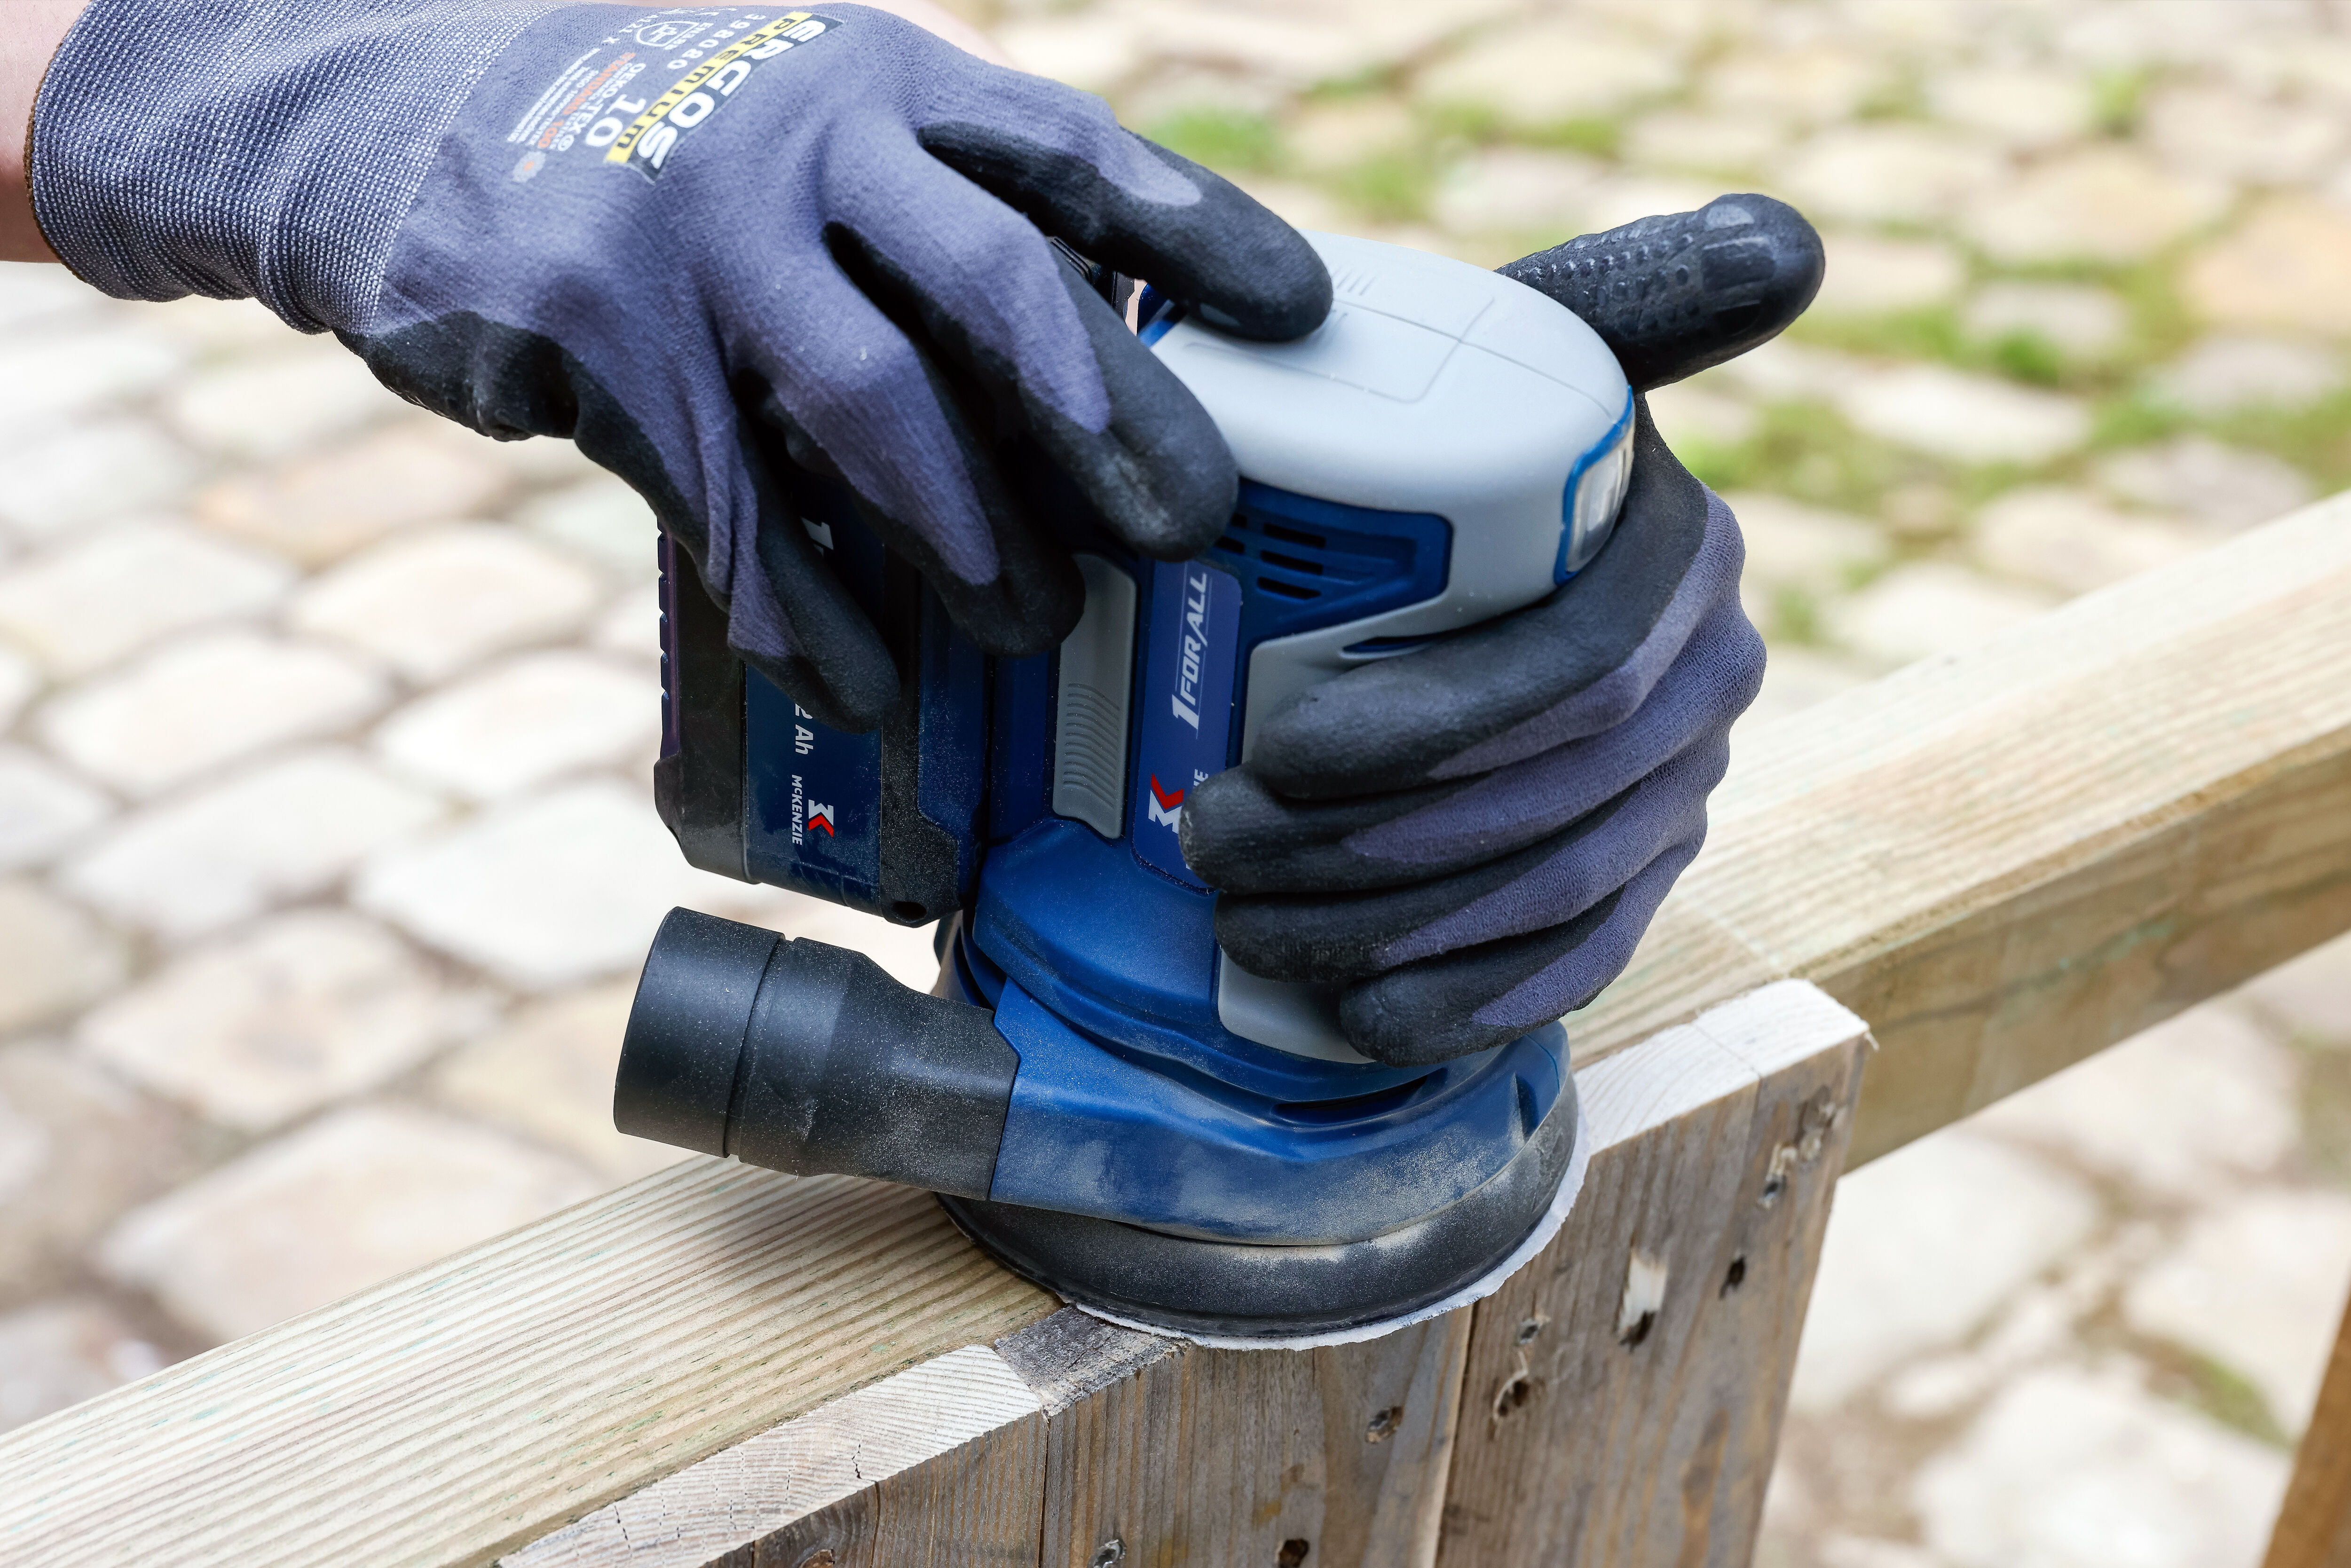
6) Fix the boards into place, screwing the whole structure together, and then sand the edges down.
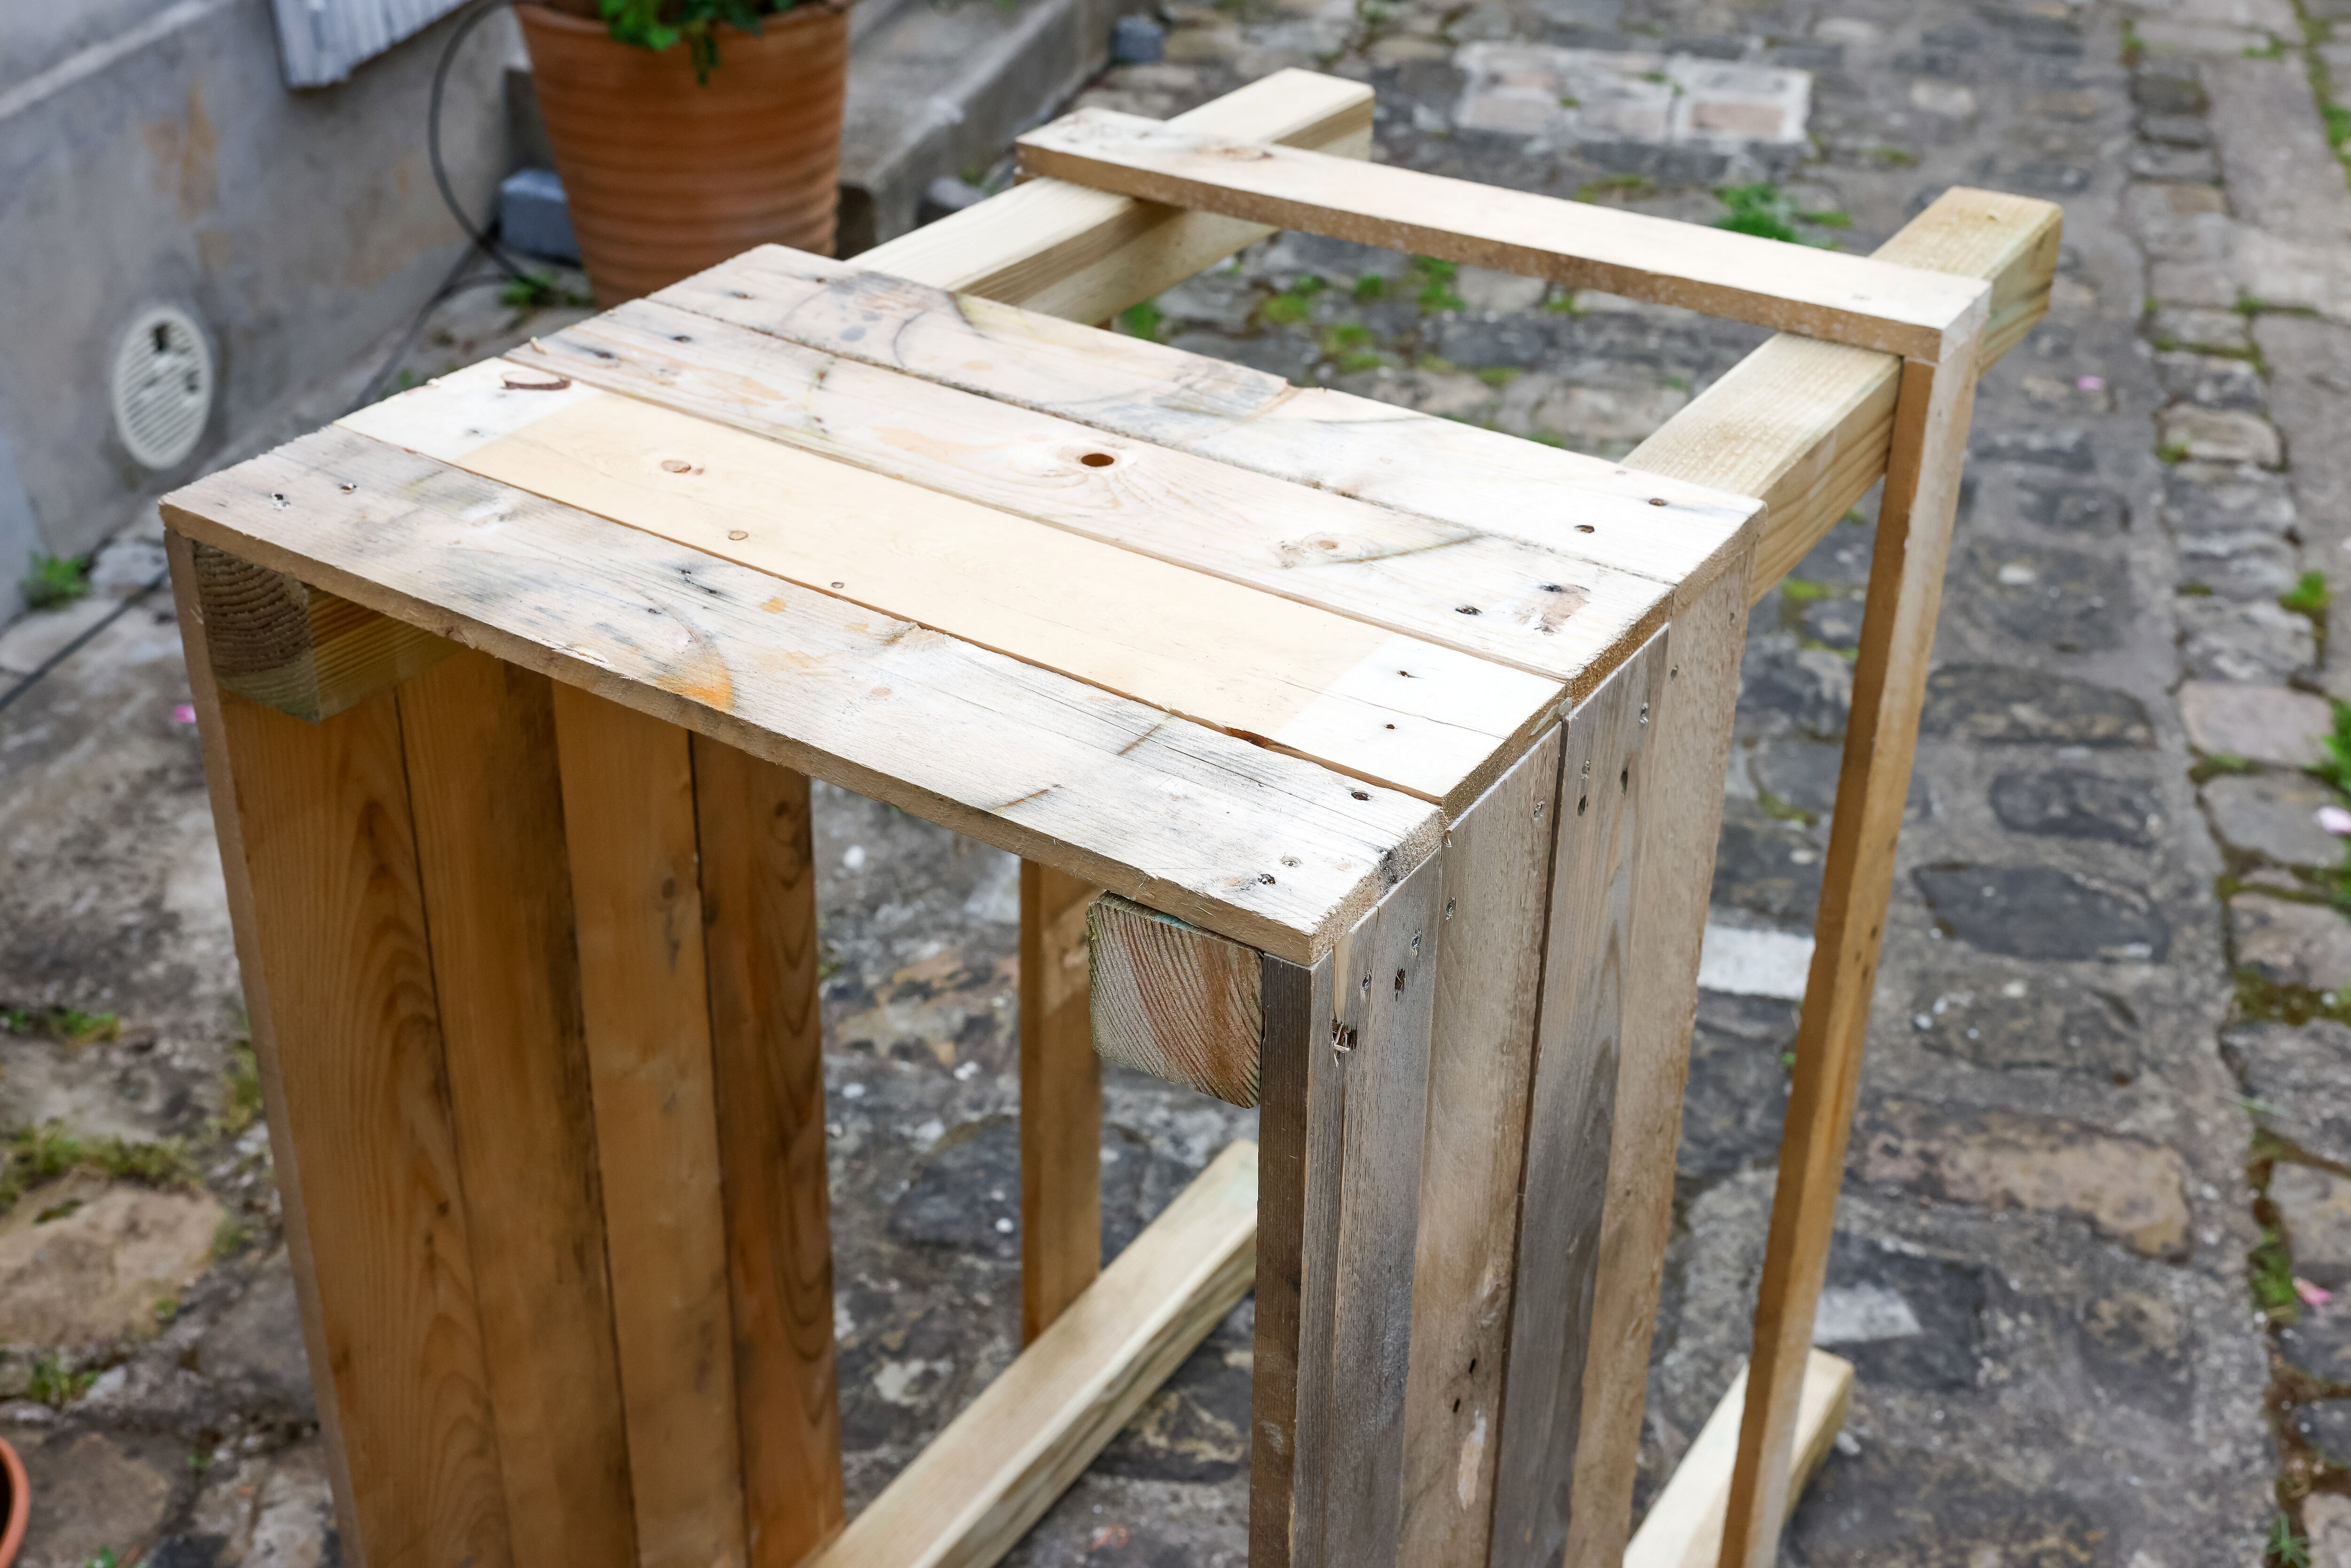
7) Position the boards that will make up the front and back of your garden bed.
8) Just as you did for the ends, drill the front and back boards and screw them into place. Then, sand down the entire construction.
9) Now prepare 2 brackets that are the same inside width as the front and back of your raised garden bed.

10) Chop a chunk off each side of the bracket, that measures the same width as each of the feet of the raised garden bed.
11) Fix the bracket along the bottom of the back panel, on the inside.
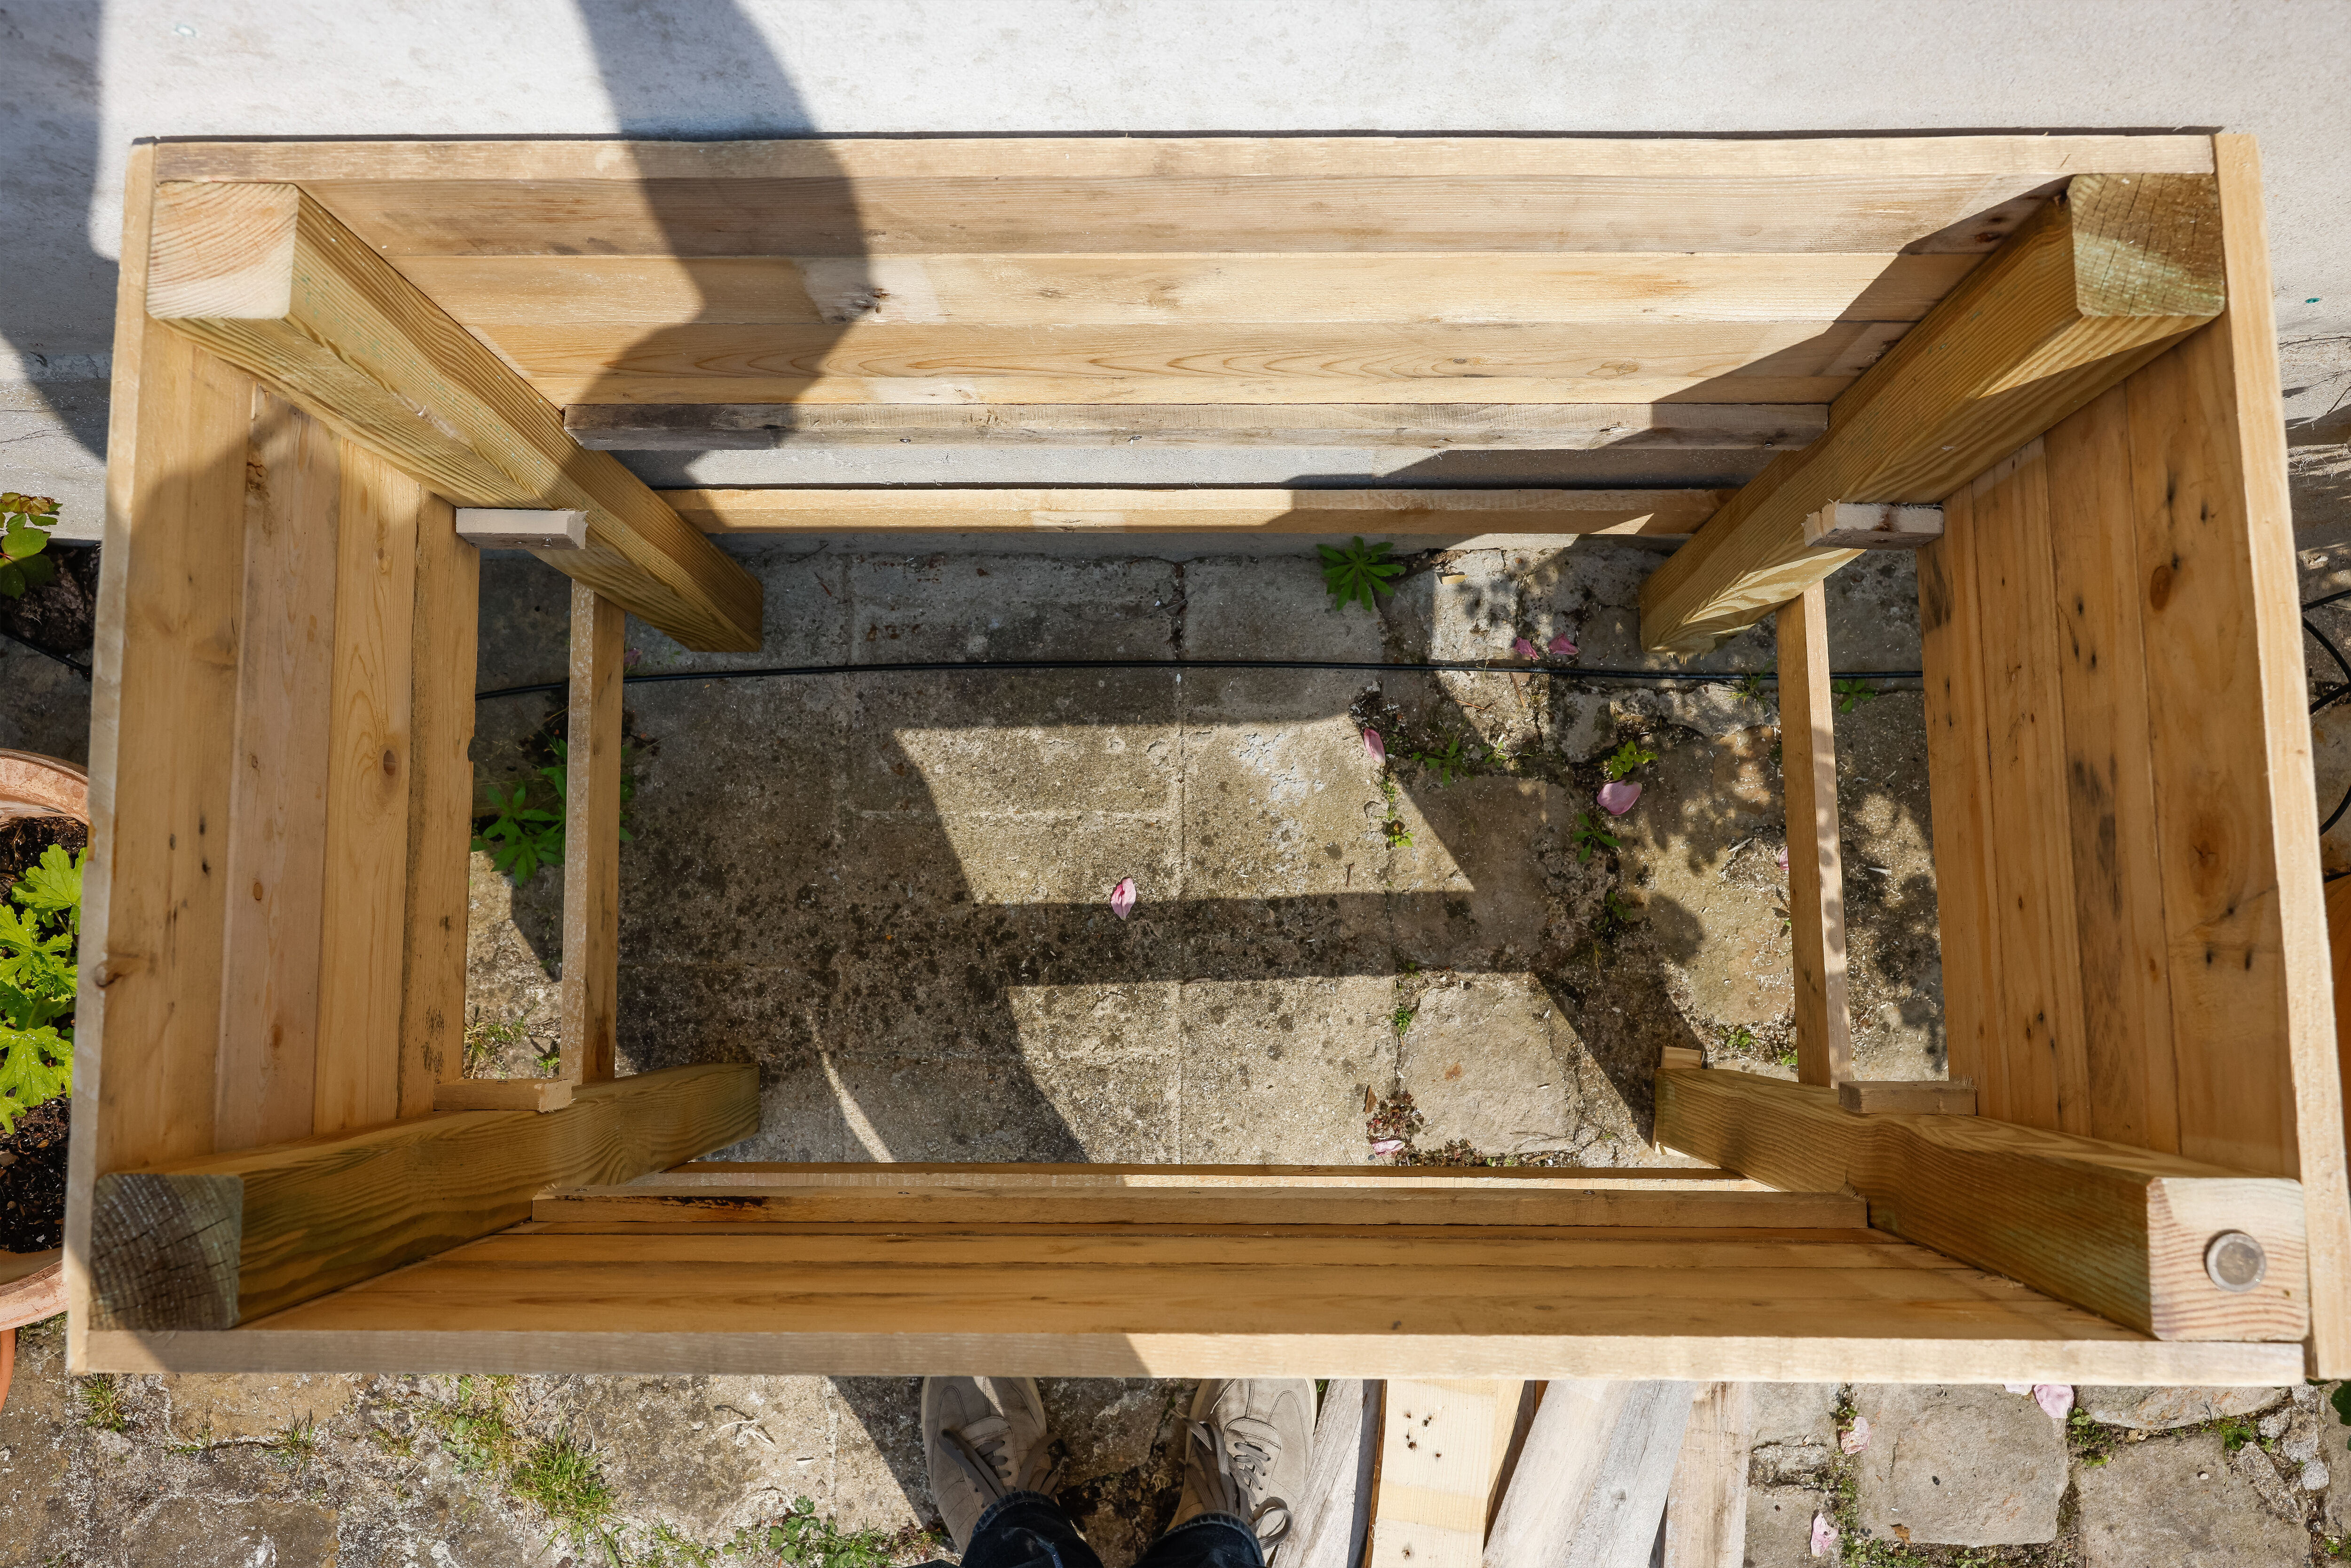

12) Fix the 2 smaller pieces of wood next to the posts, at the same level as the bracket. Then repeat steps 11 and 12 along the bottom of the front panel, on the inside.
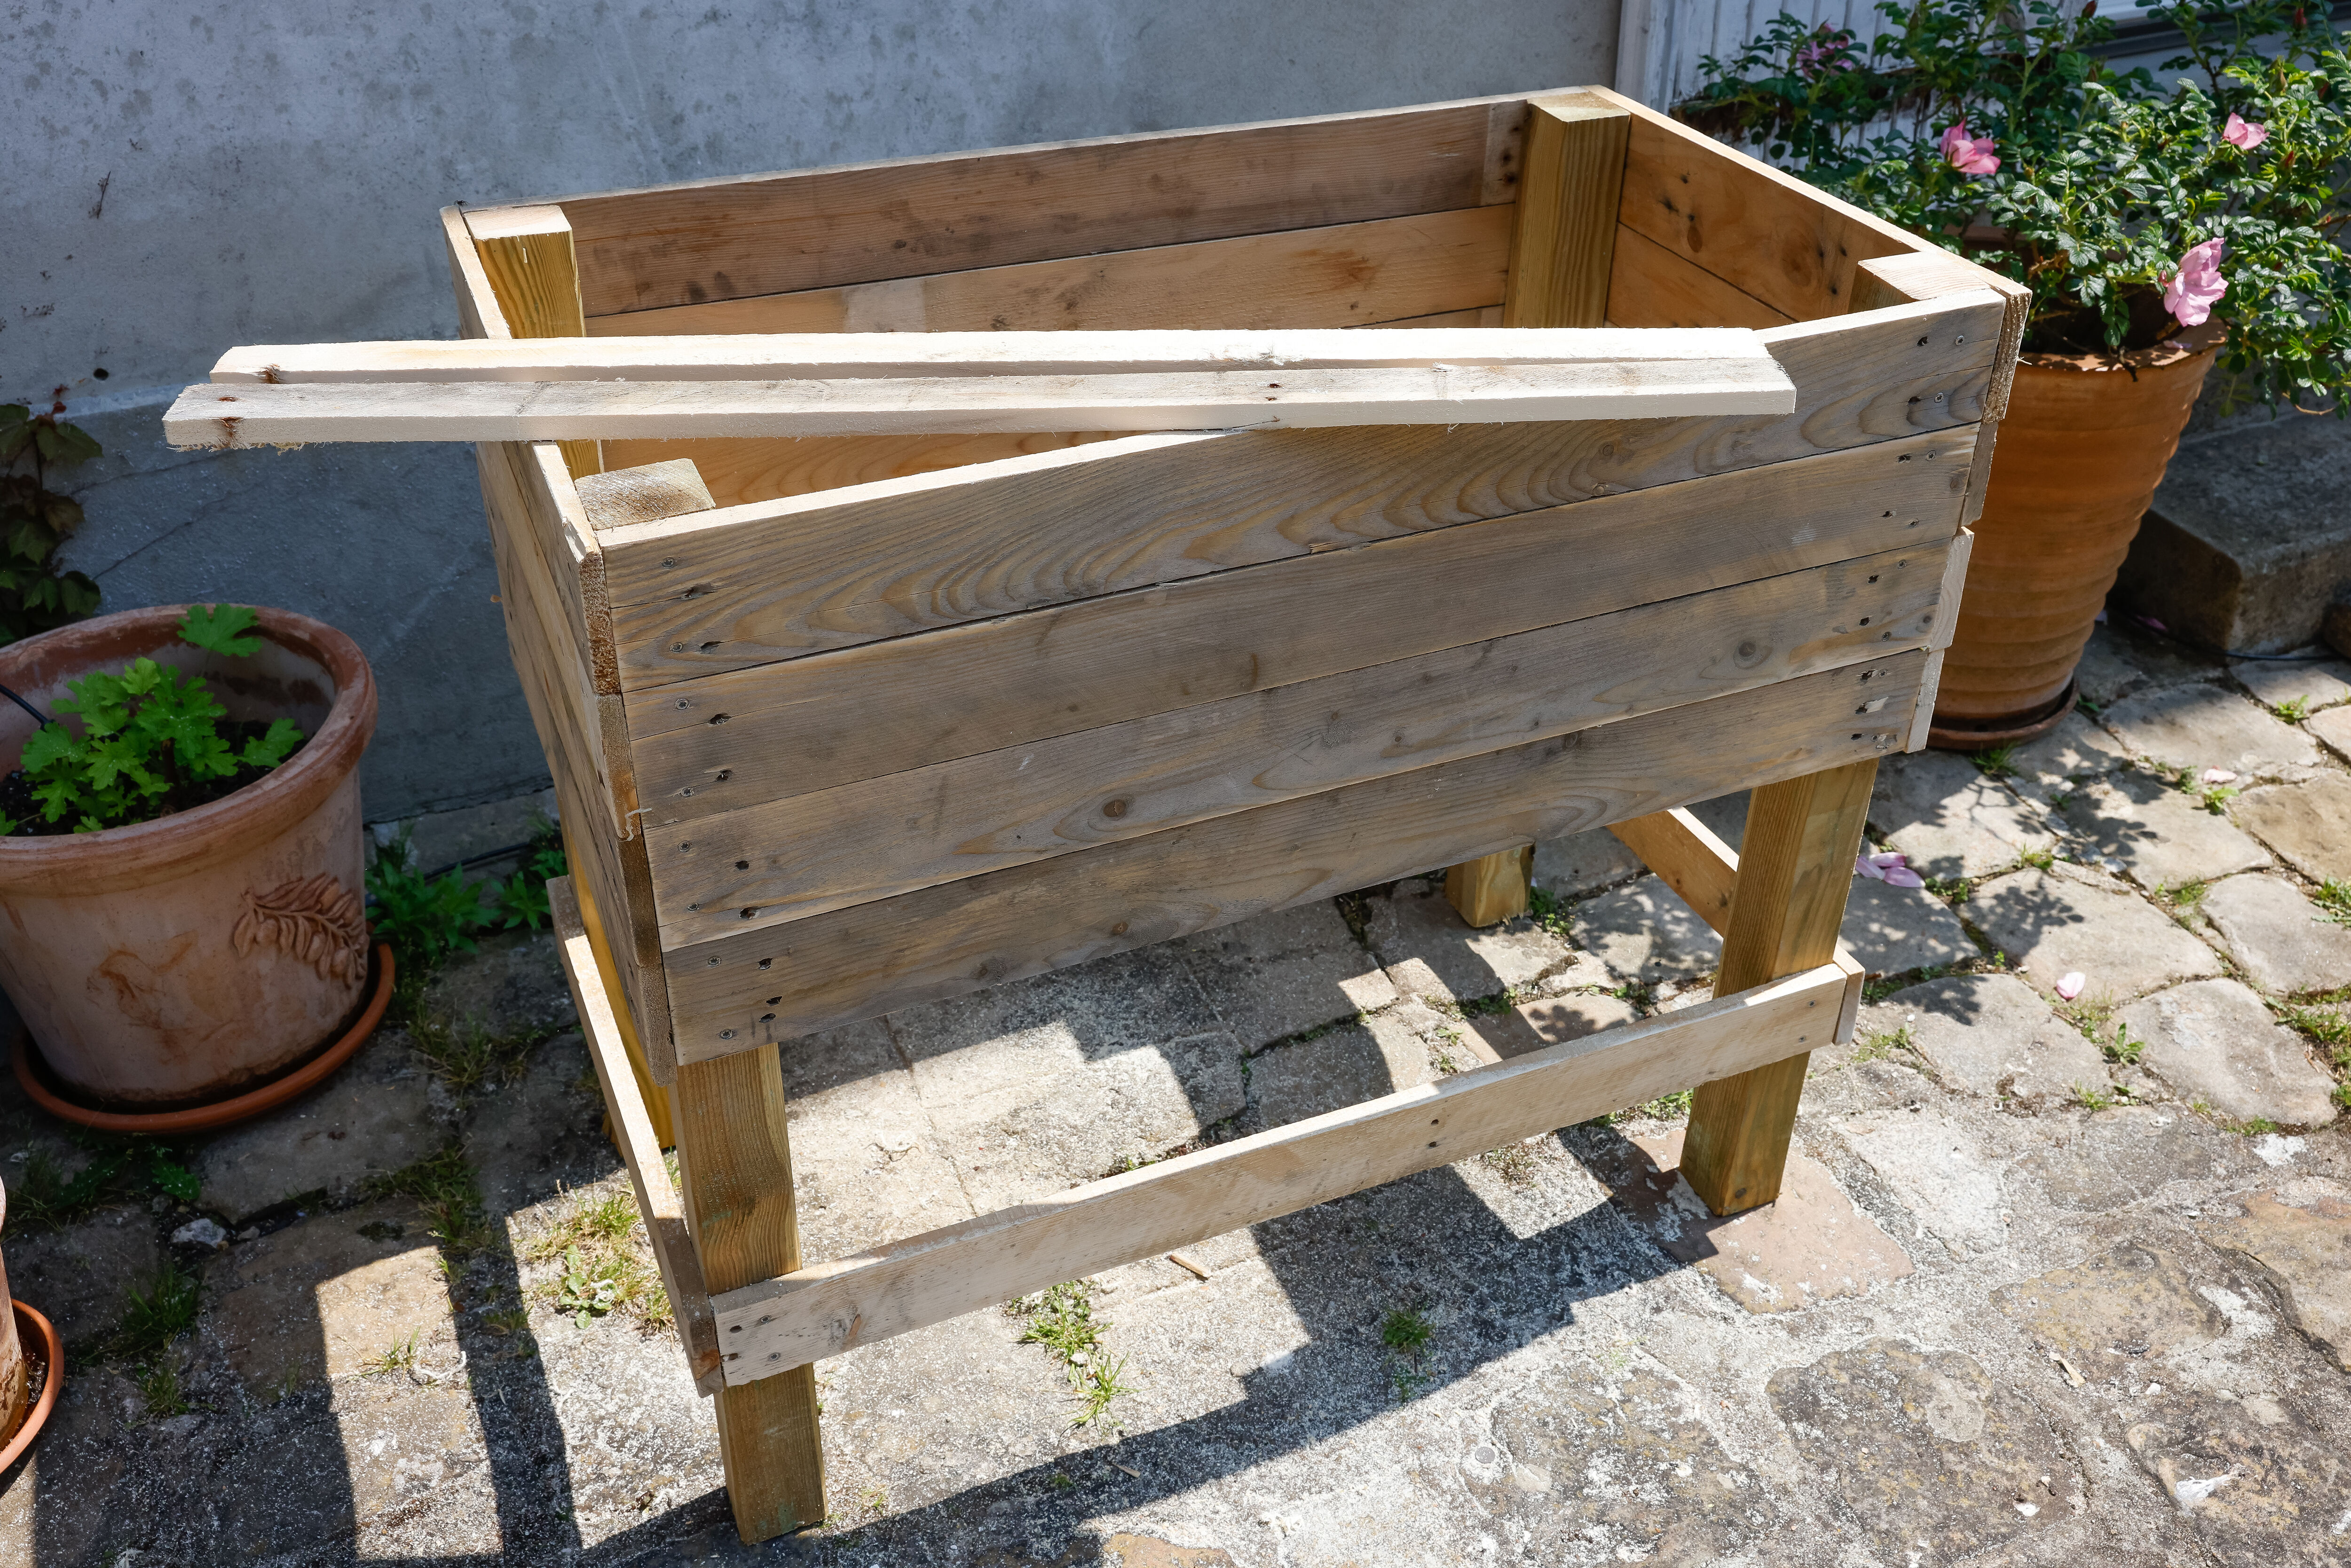
13) Using the brackets as a support, lay the chopped-up boards intended for the base of the garden bed into position. Leave a little space between each board for drainage, so water can be evacuated from the garden bed.
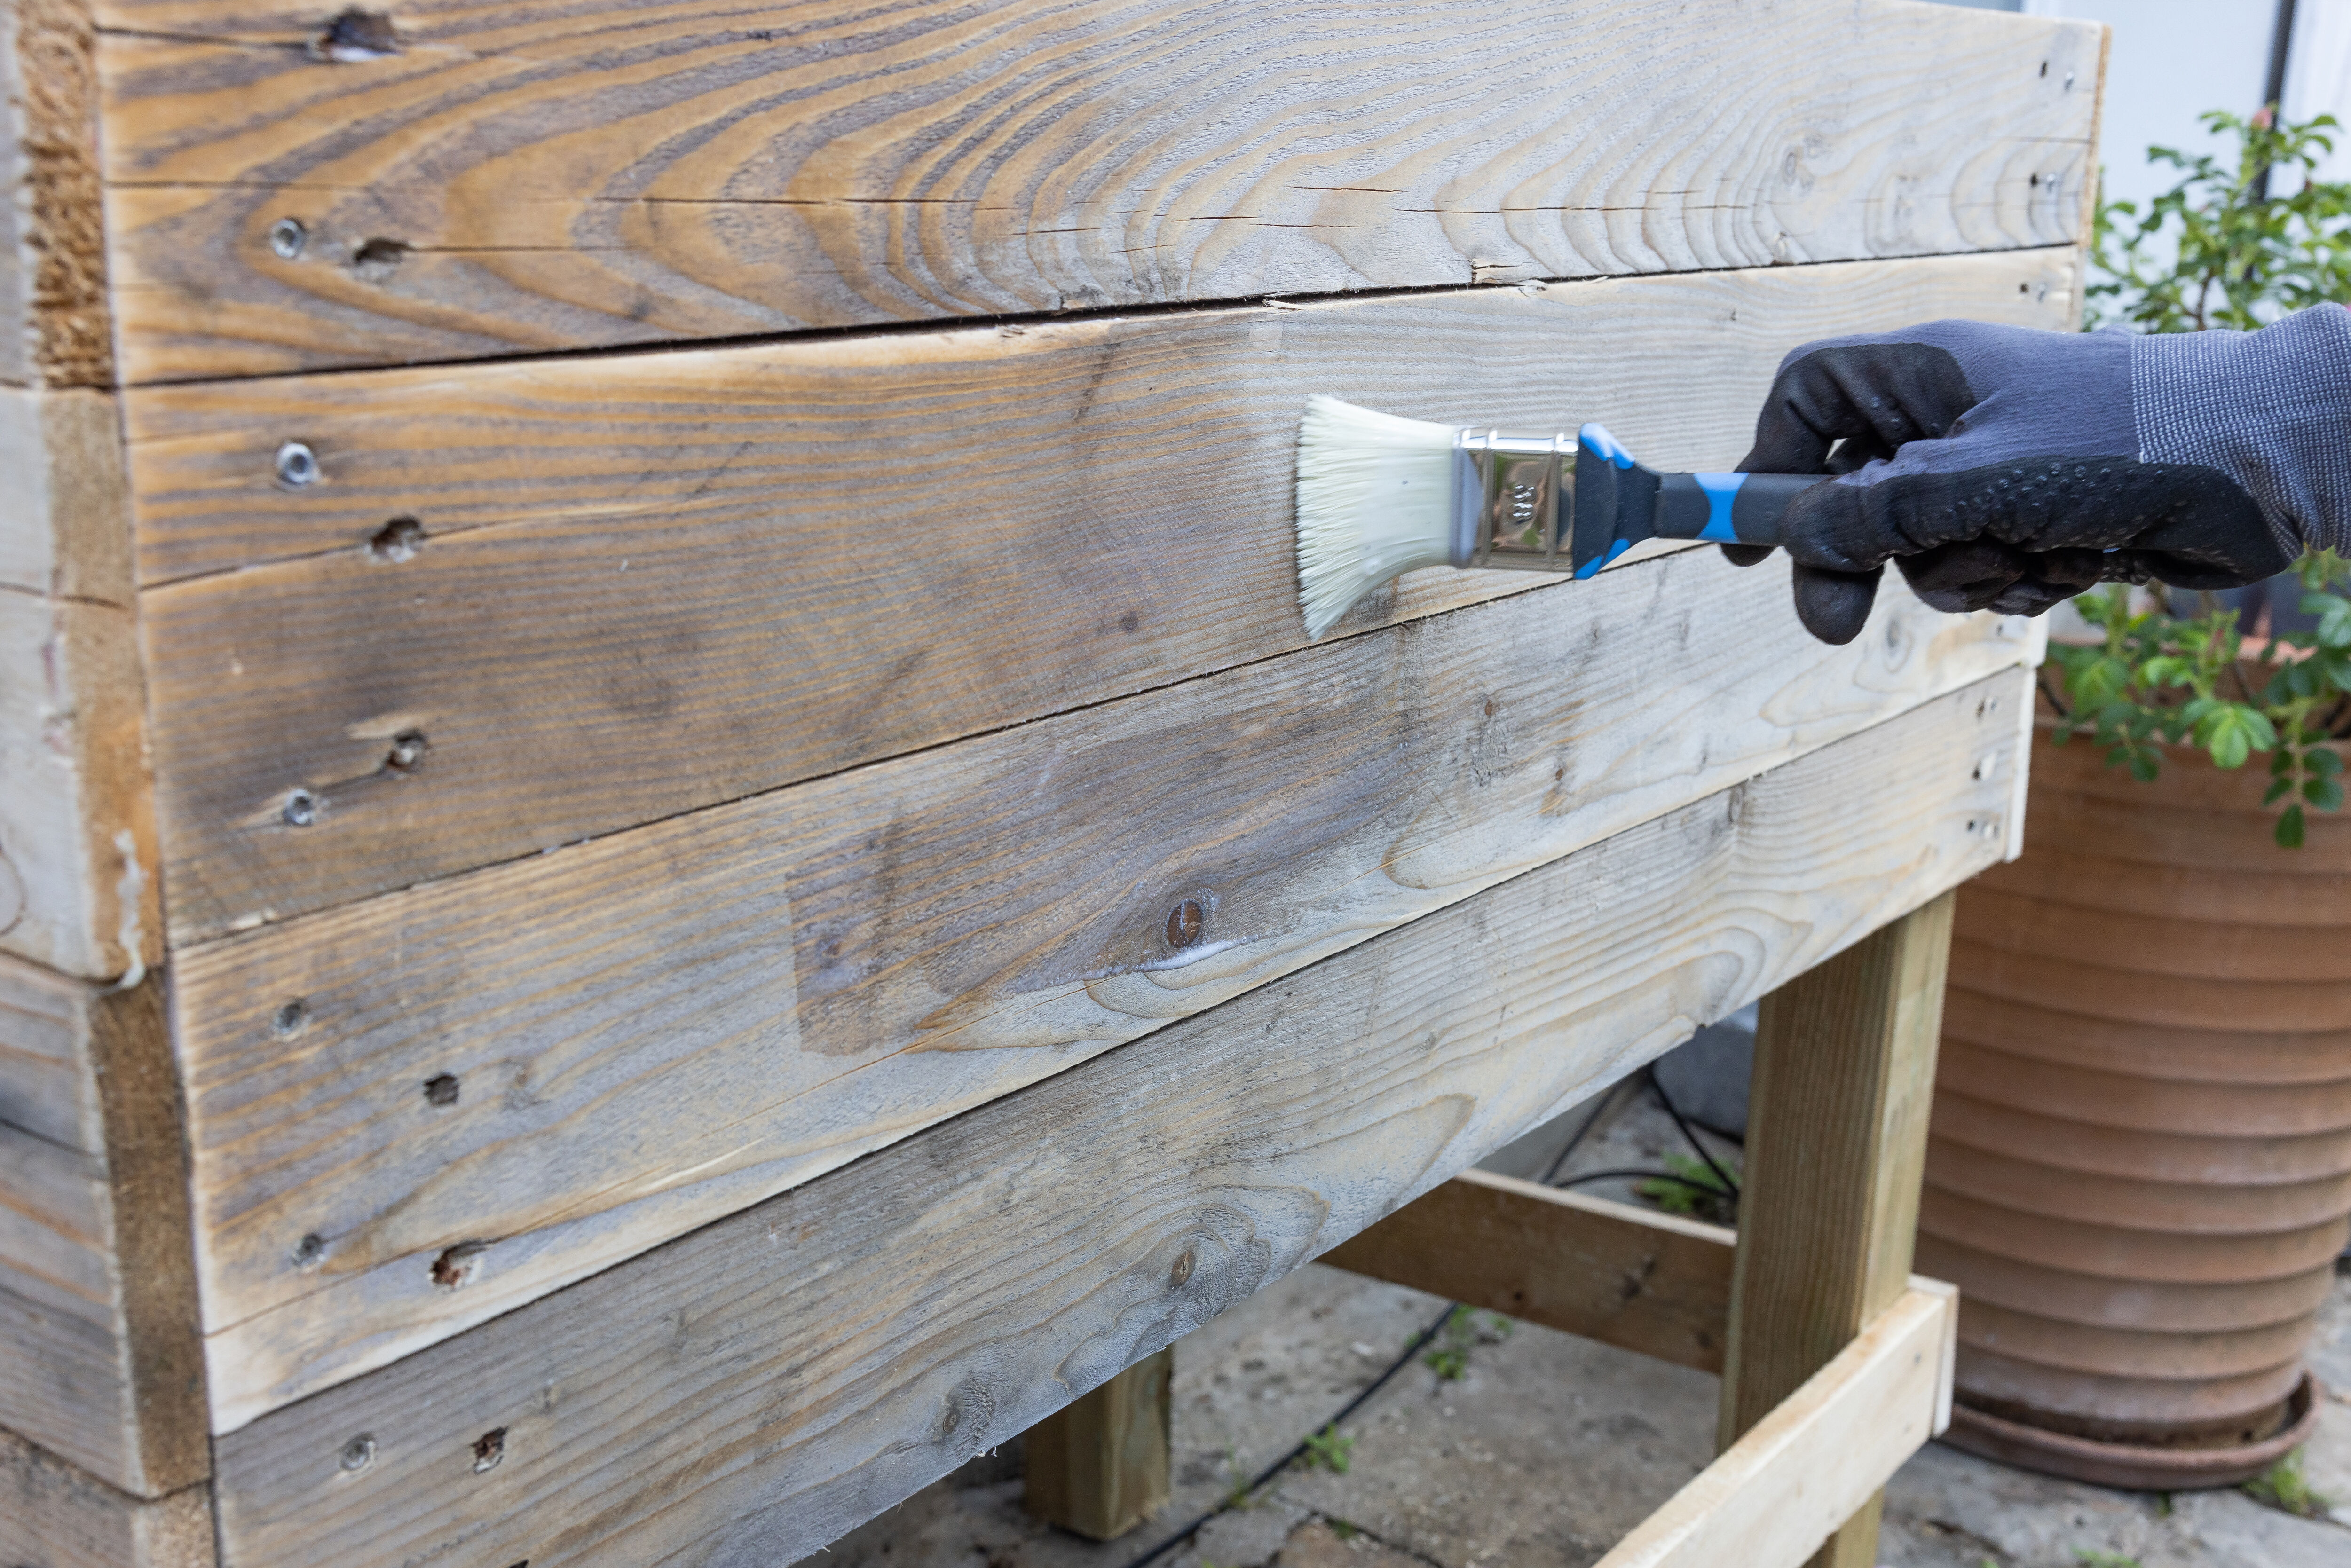
14) Sand down the entire garden bed and then paint it using wood stain.
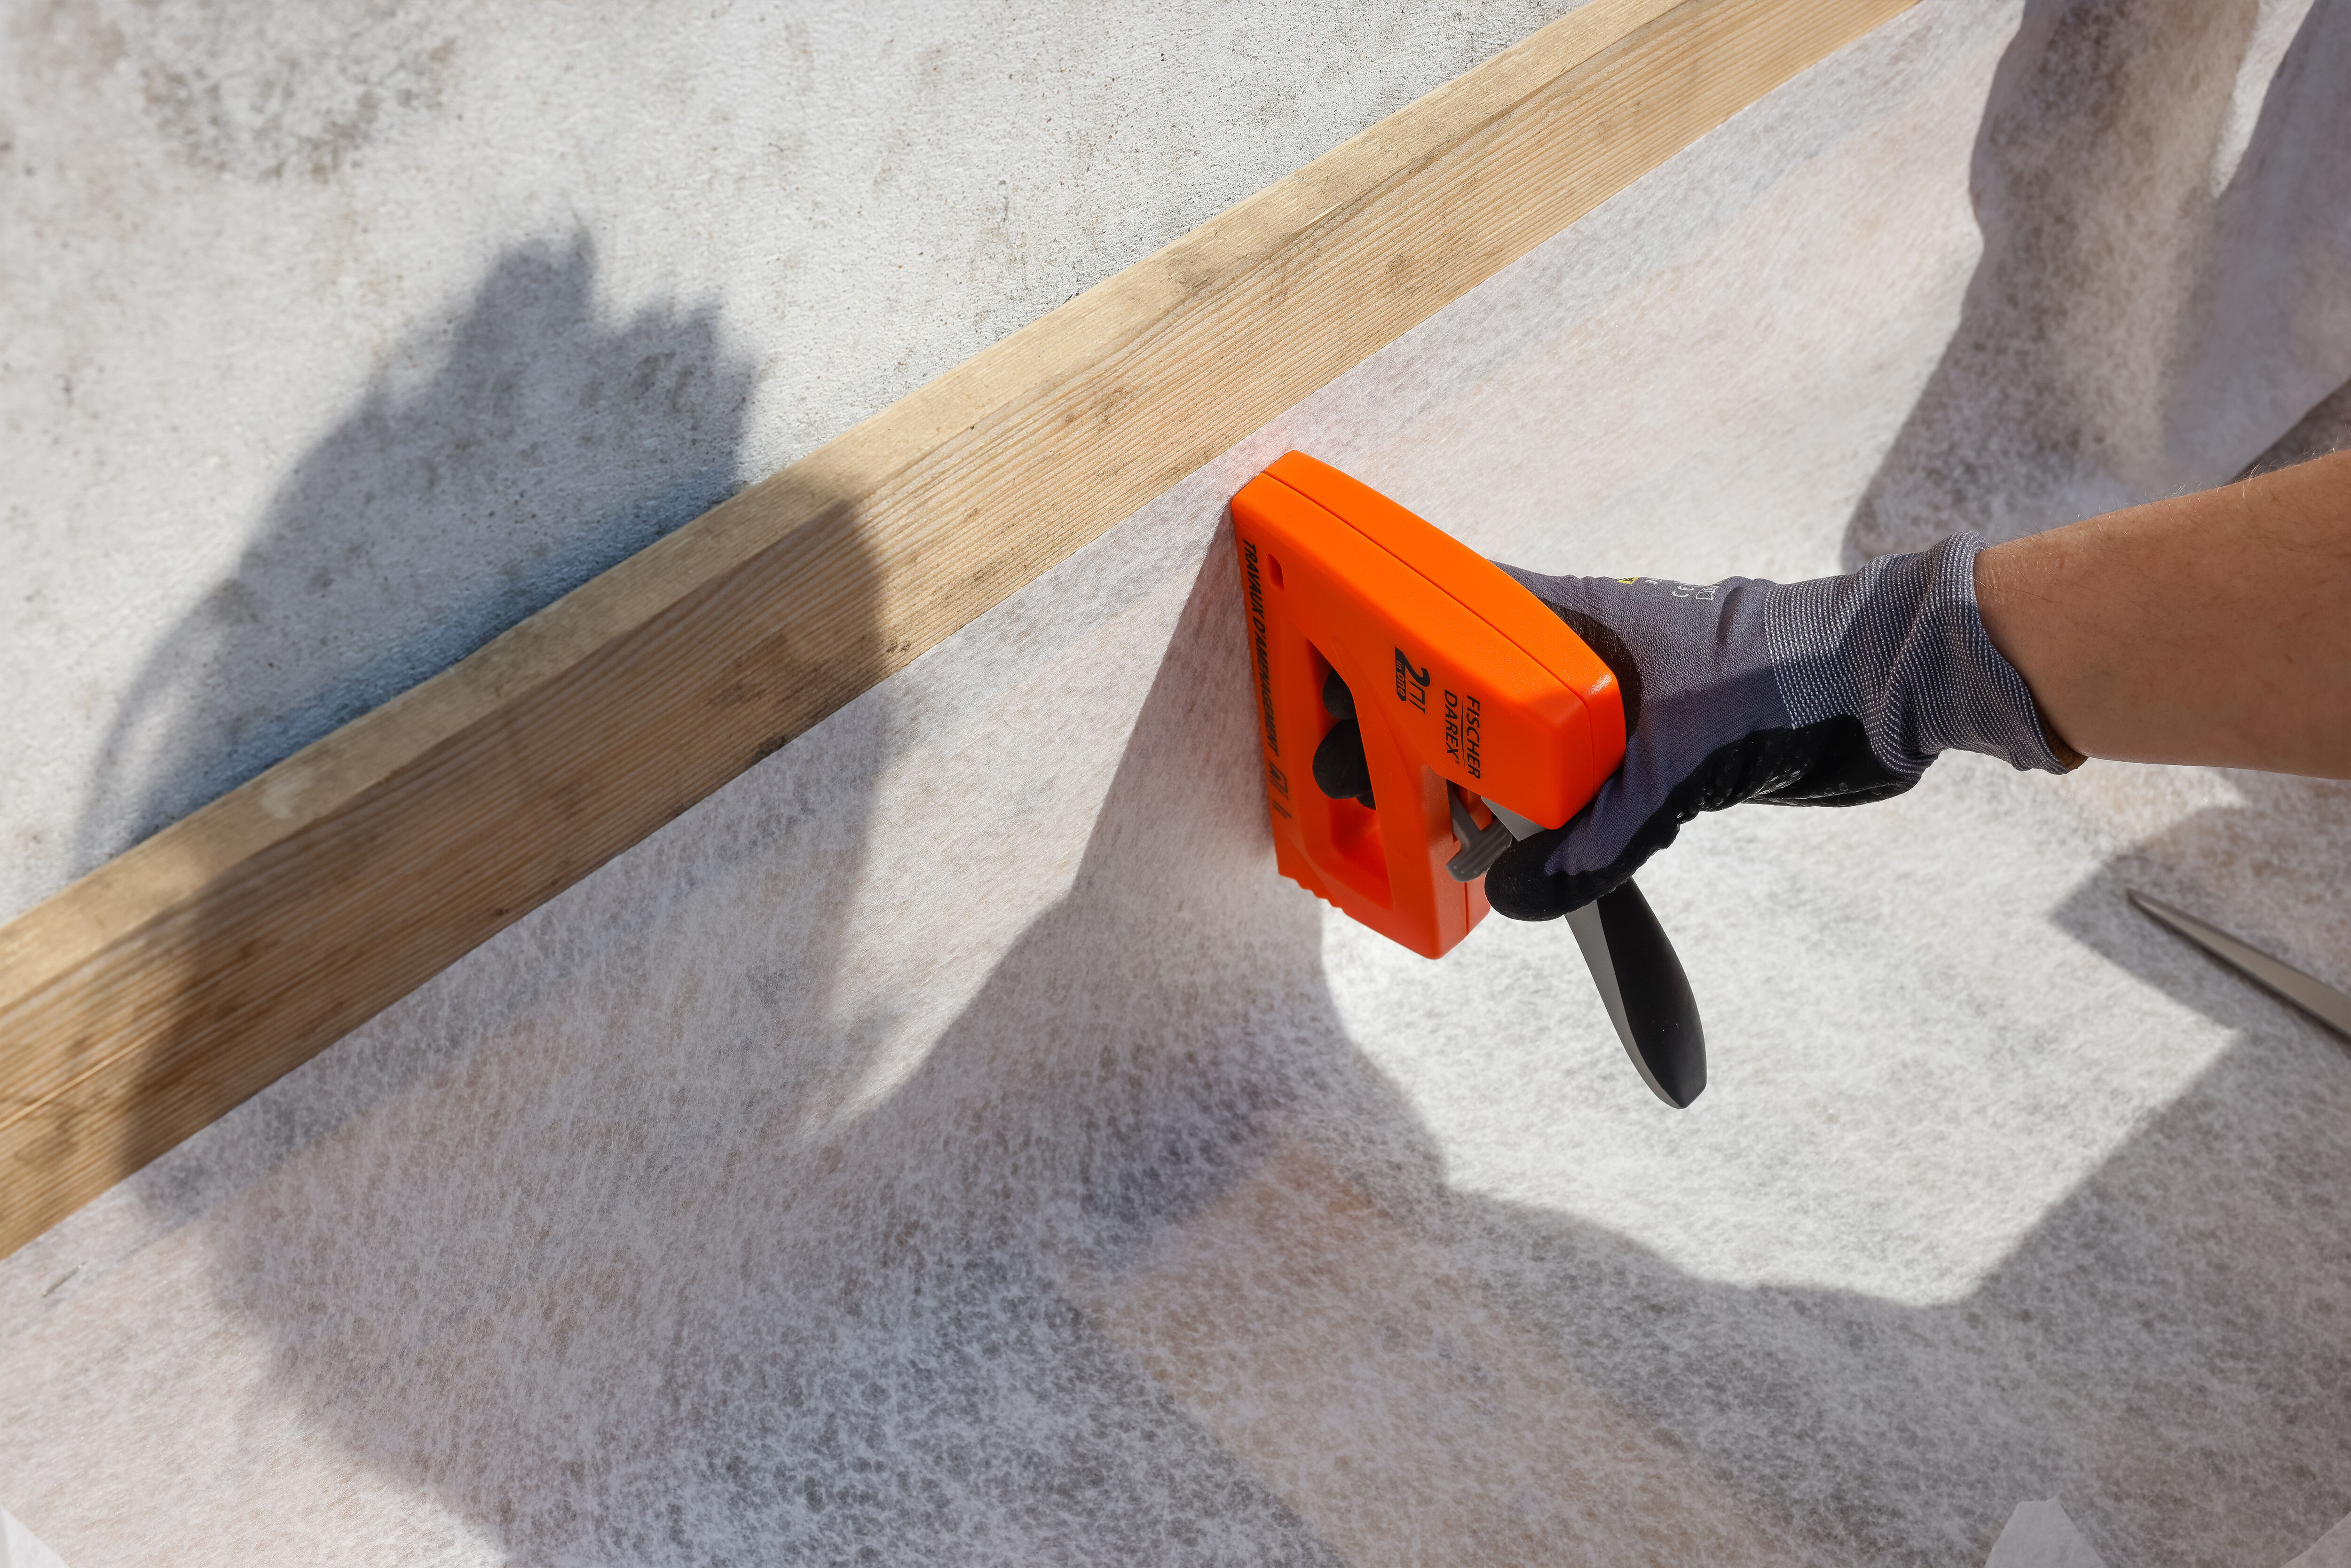
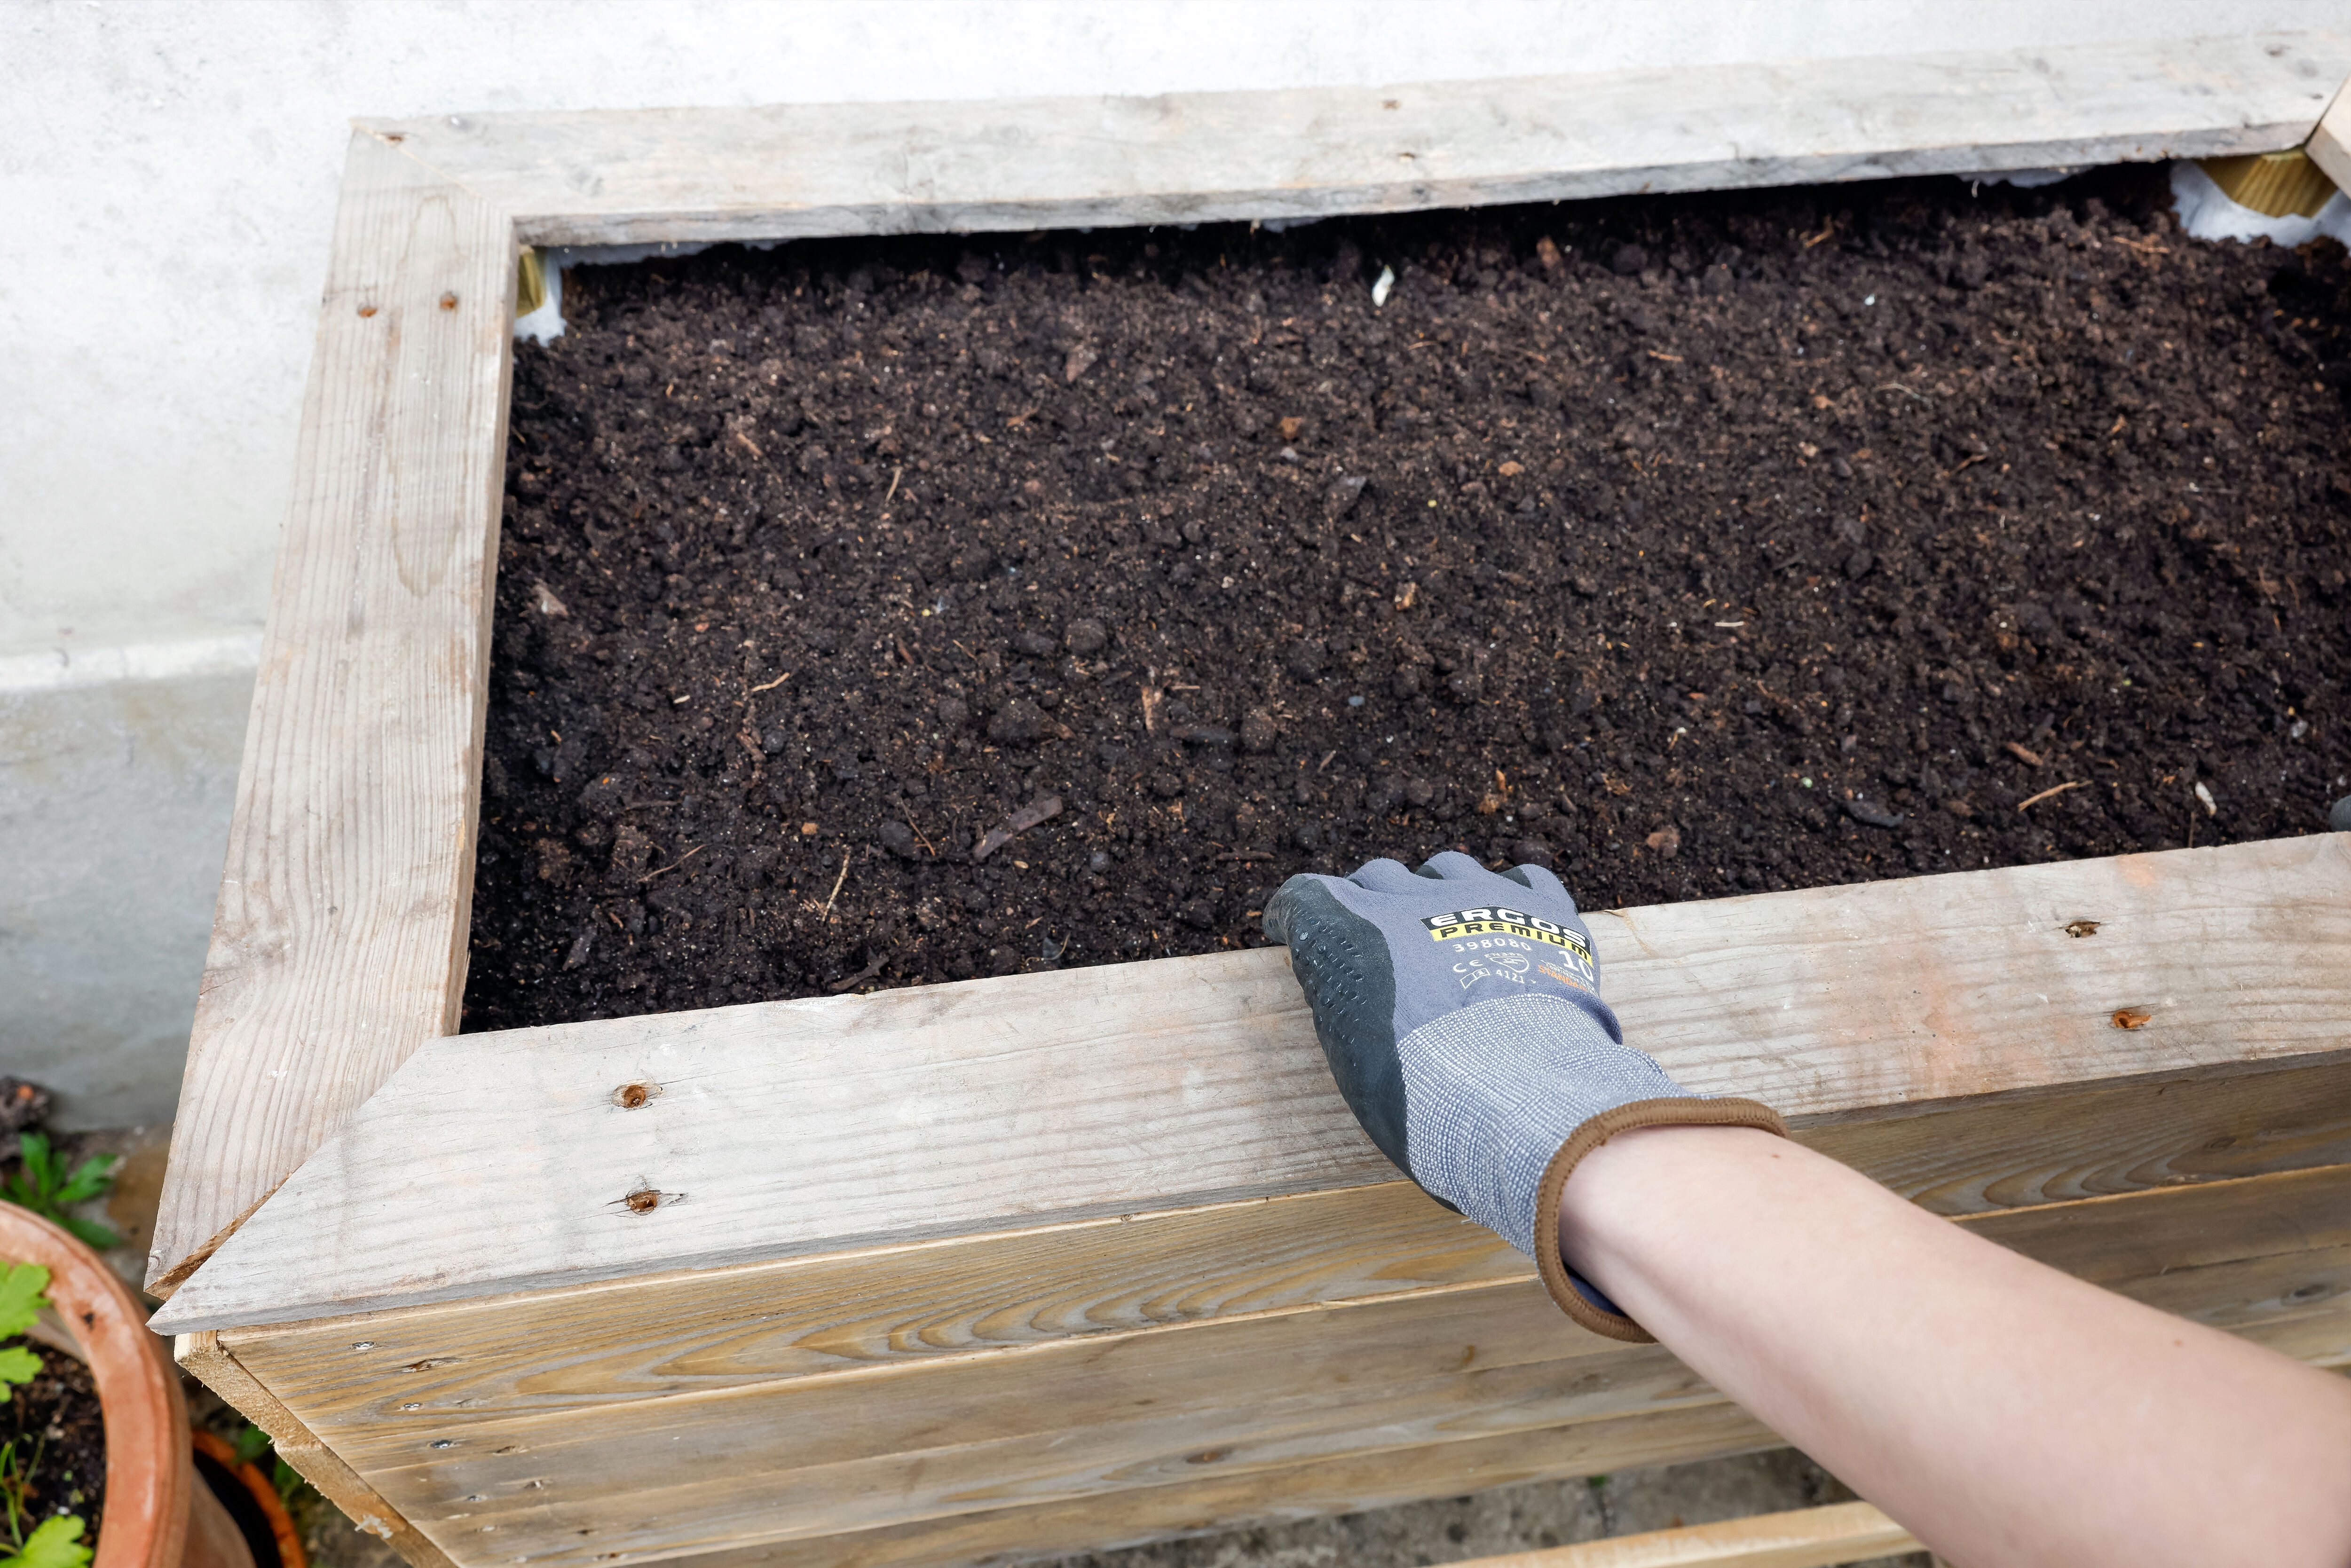
15) Lay down geotextile fabric inside your raised garden bed.
16) Spread out clay balls across the bottom of the garden bed, then fill it with compost.
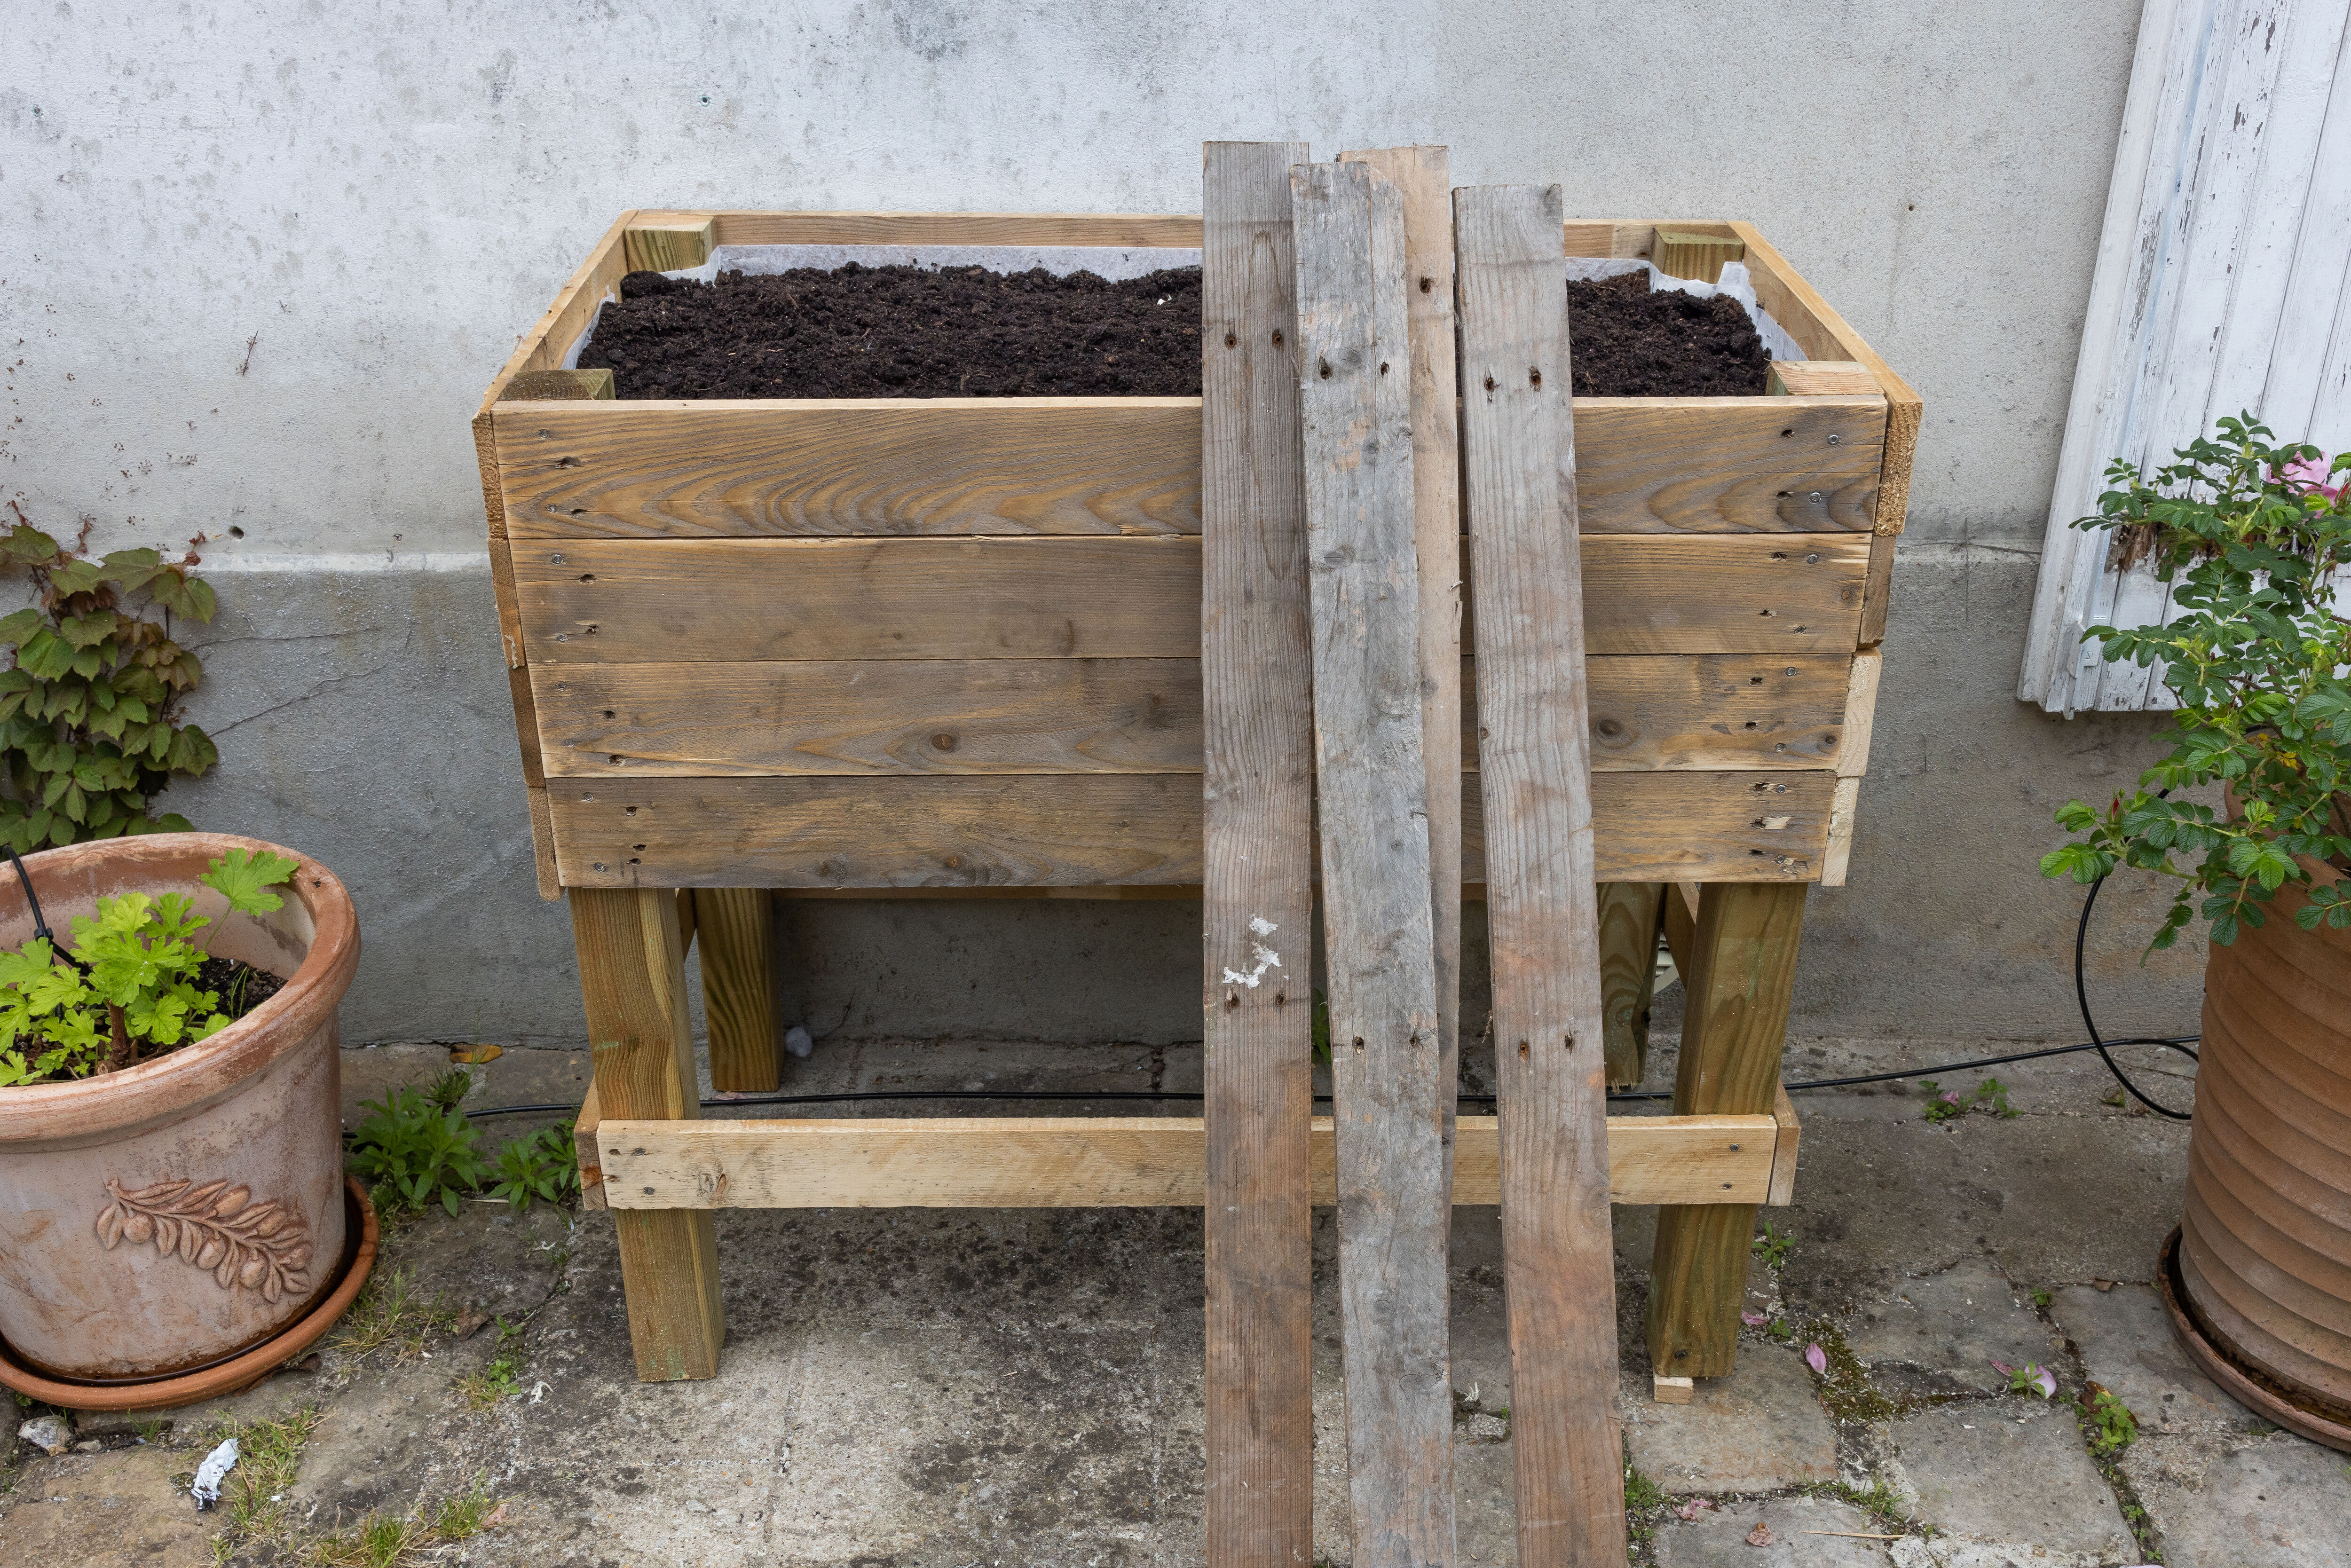

17) Prepare the last 4 wooden boards for a quality finish.
18) Align one of the wooden boards with the front or back of your garden bed and trace a line, so that they both end up being the same length.
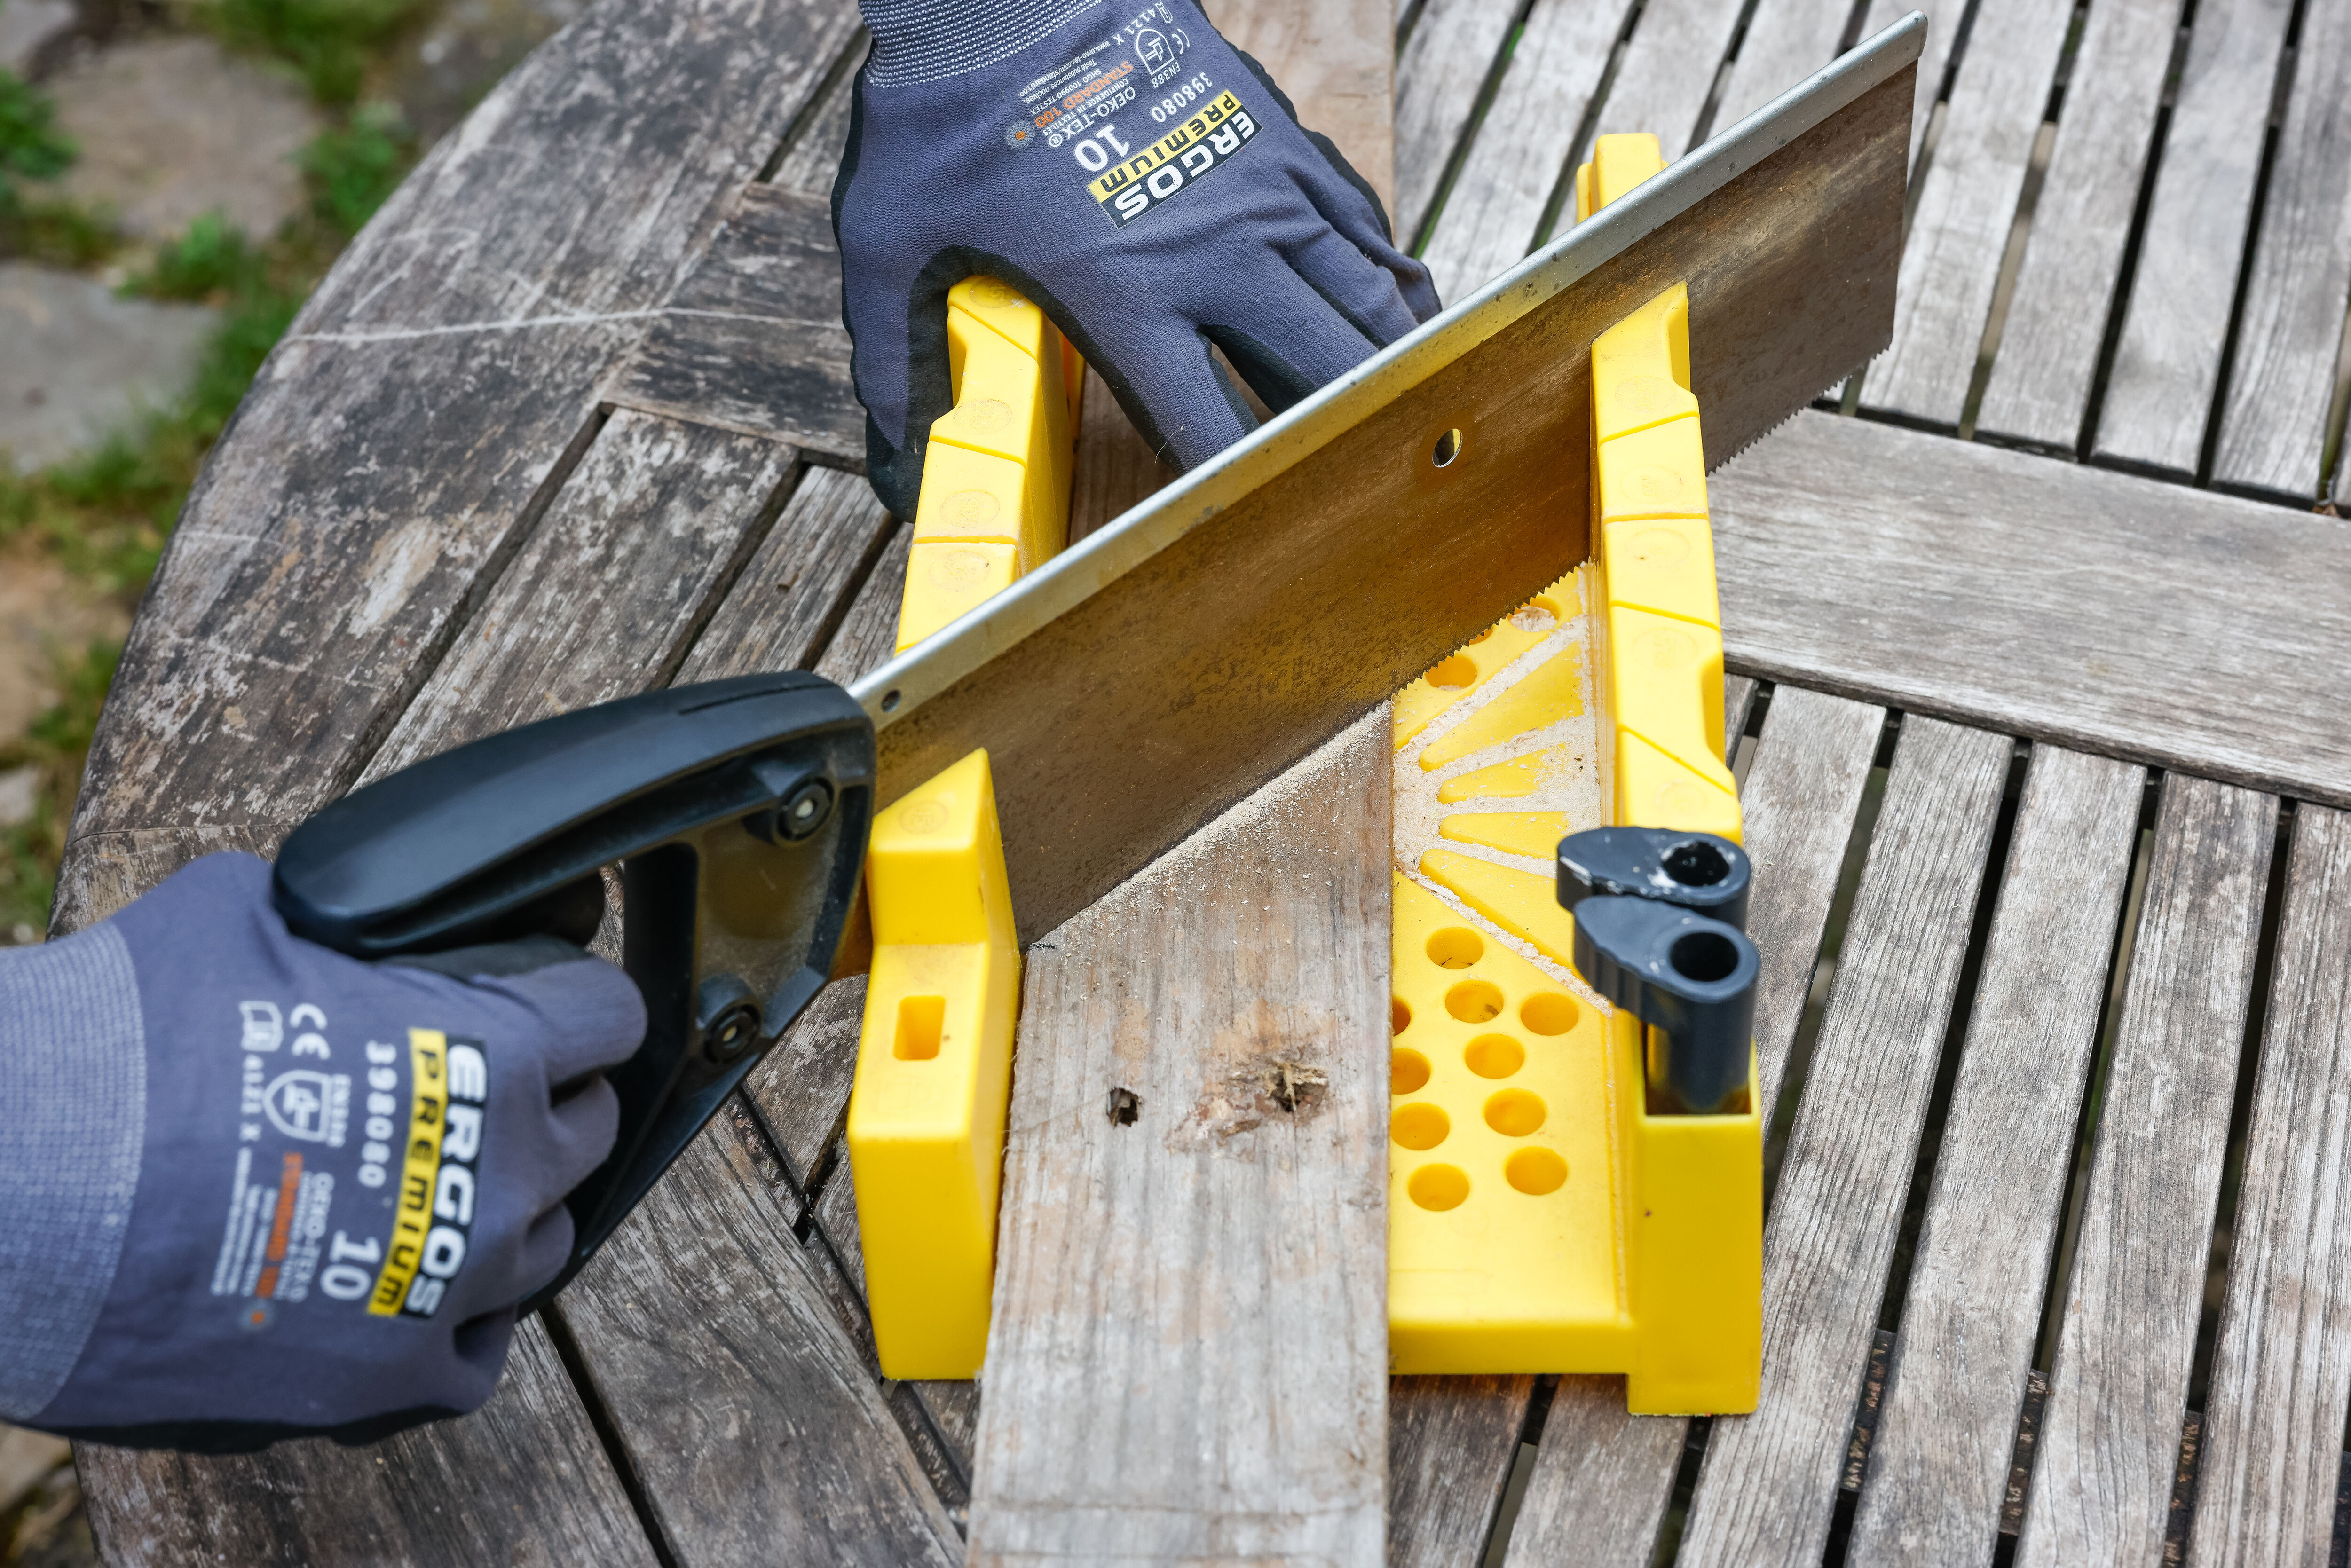
19) Chop the board at a 45° angle on both sides, using a mitre box (or angle finder), and repeat the process for the 3 remaining boards that will make up the 3 other edges of your garden bed.
20) Position the 4 boards on top of your garden bed.
21) Drill and fix the boards into place using screws.
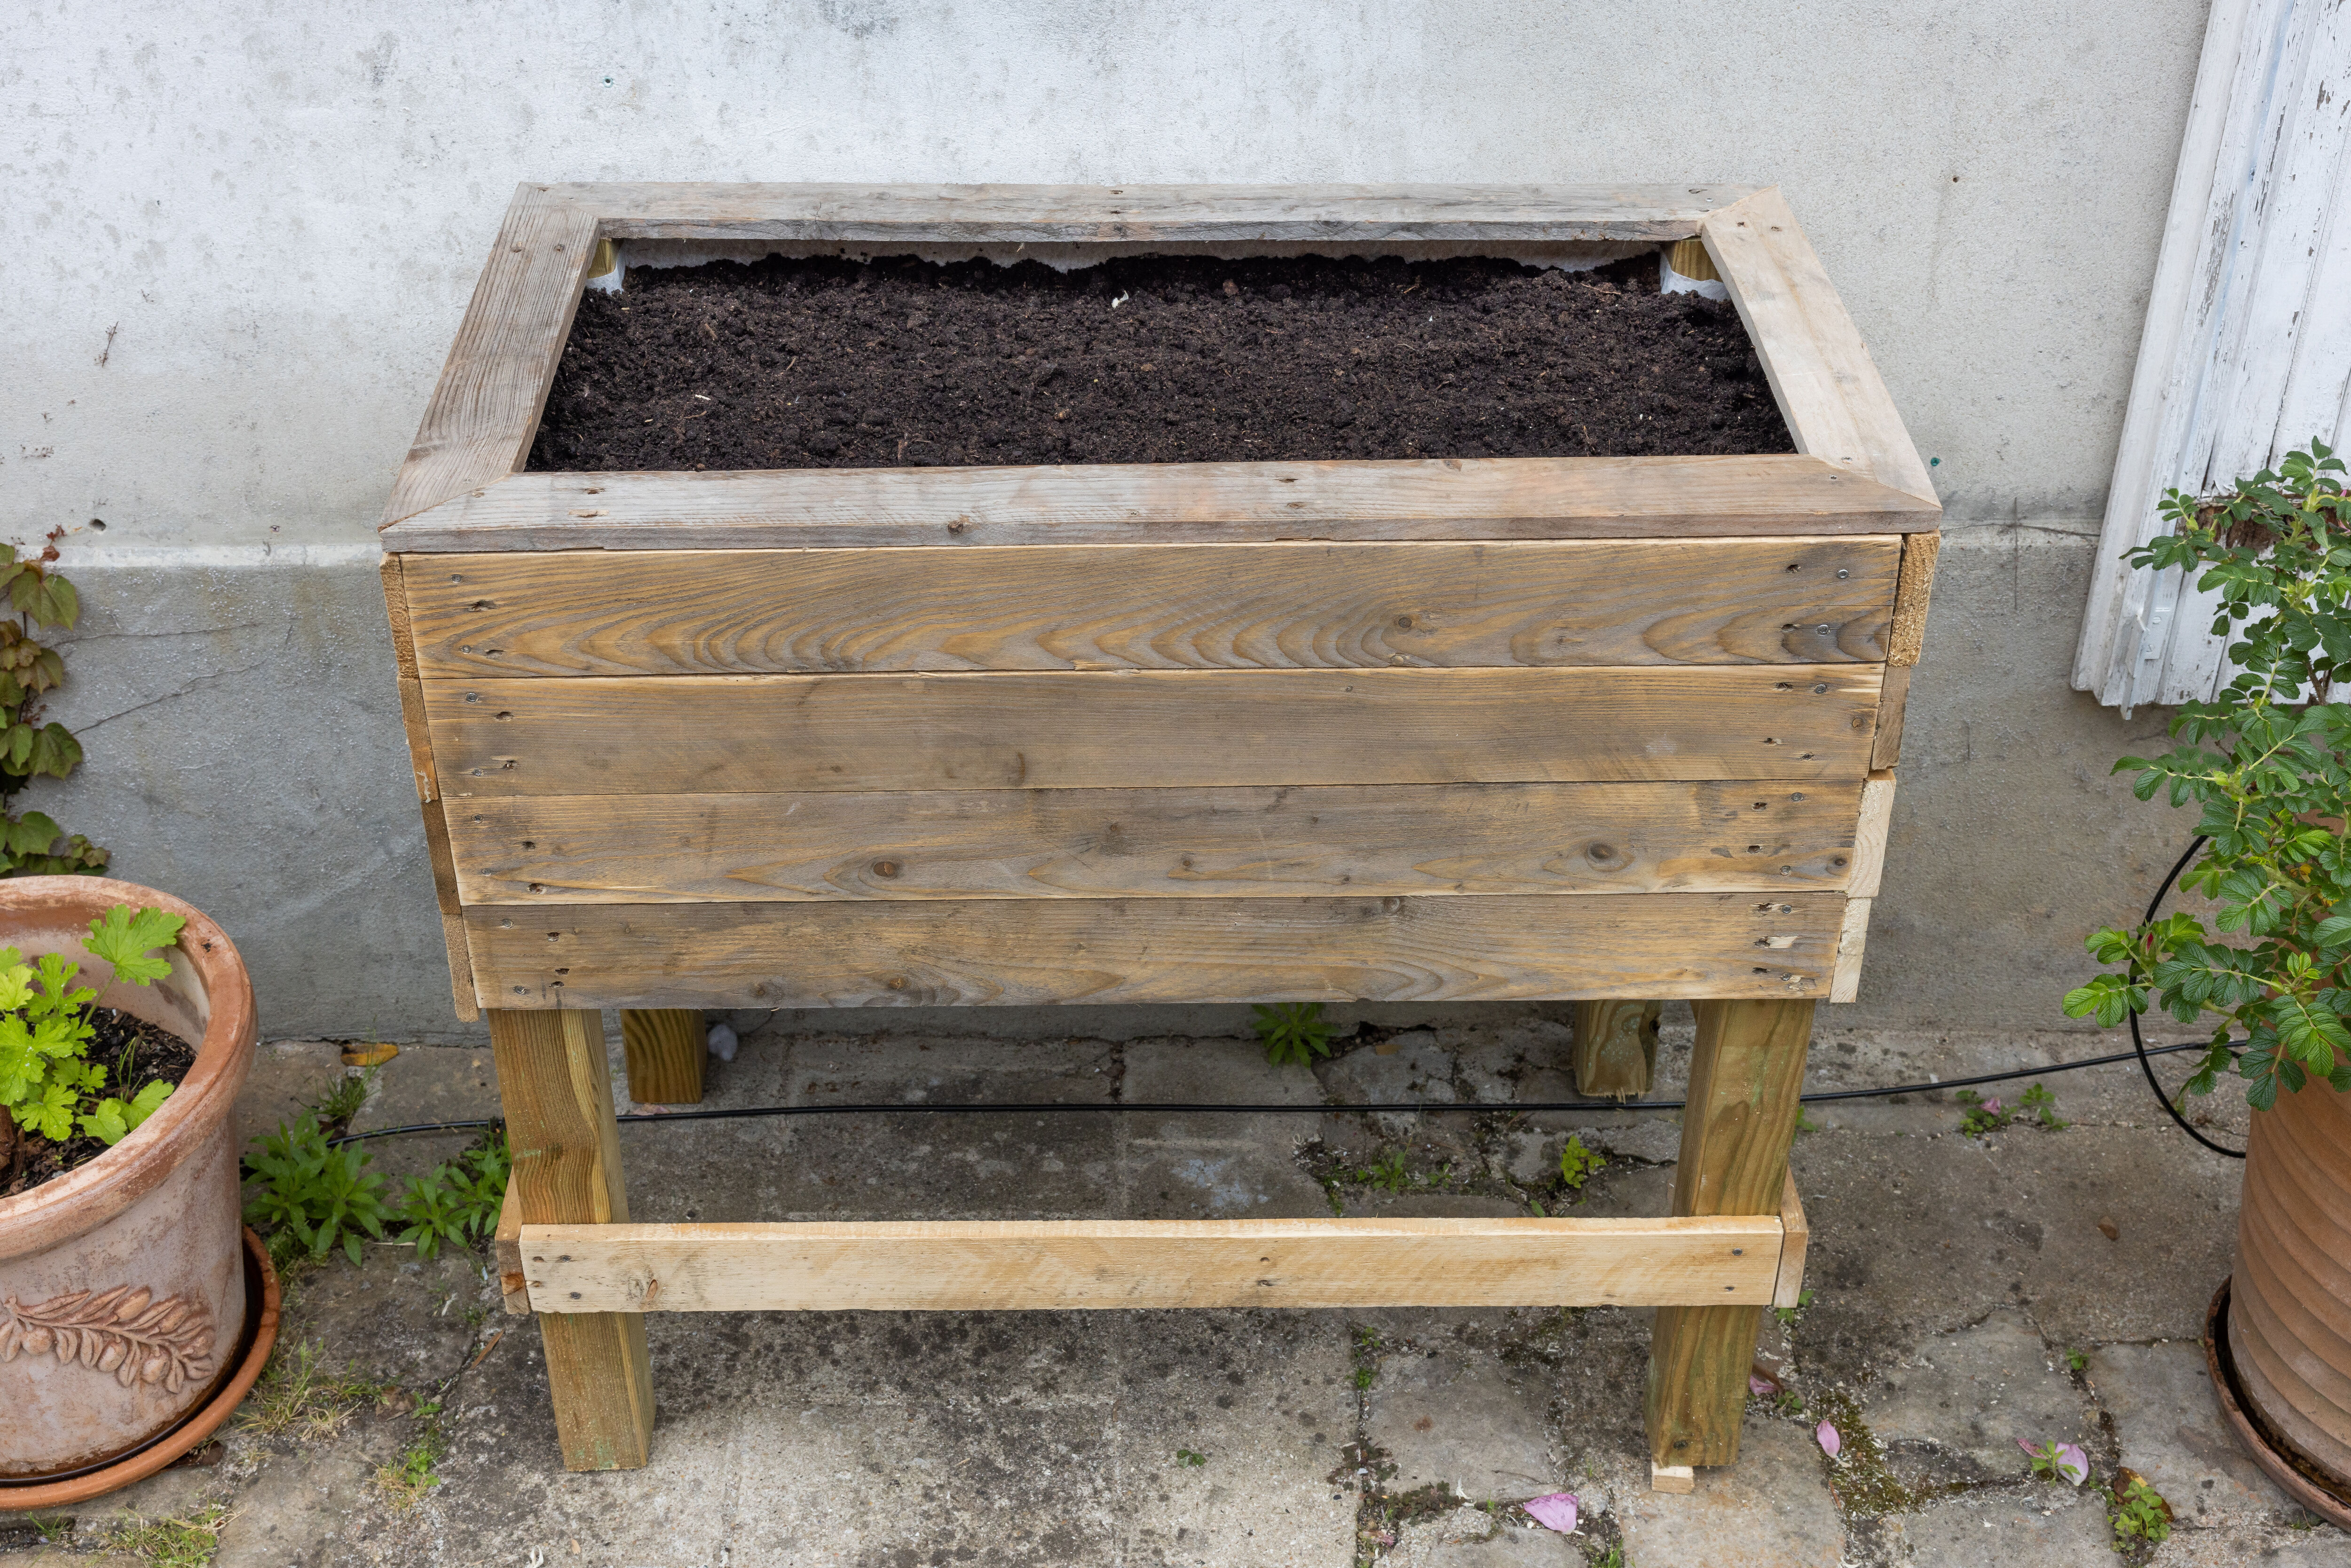
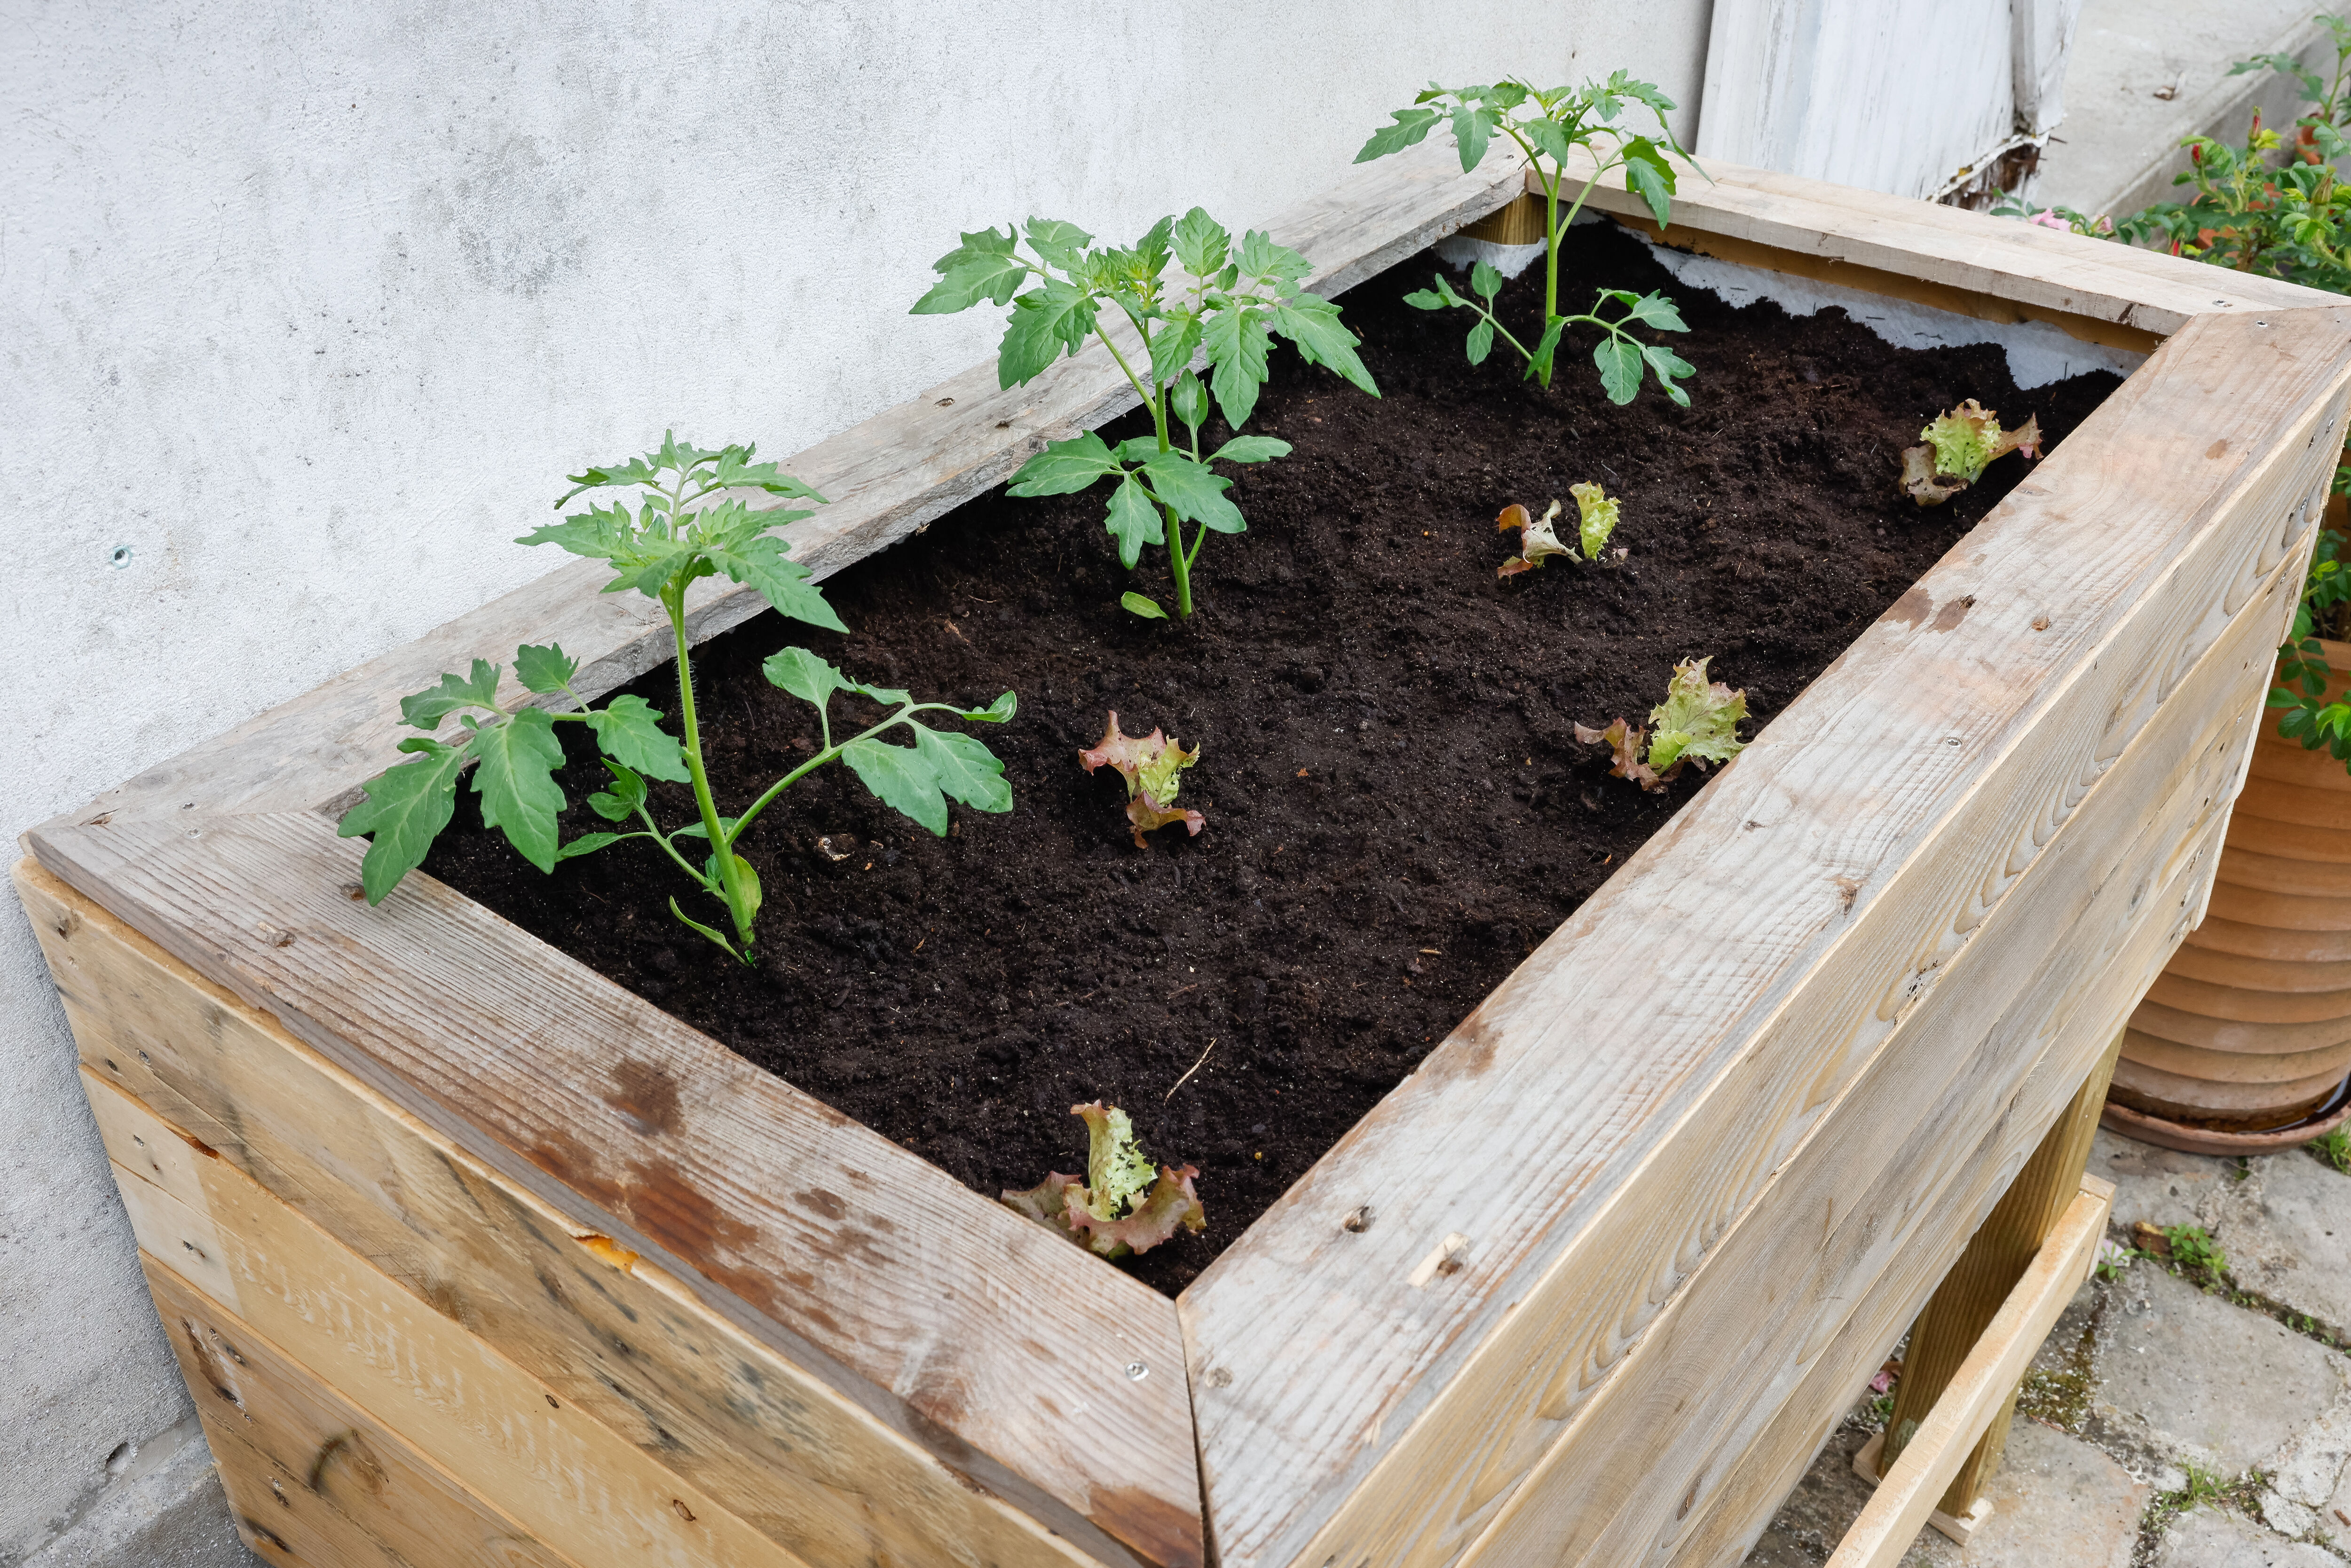
22) Your raised garden bed is ready! You can now plant and grow whatever you want.
Job done!
That’s how to upcycle wooden pallets to make a raised garden bed. With our easy-to-achieve step by step instructions, transforming your outdoors space into a horticultural haven has never been easier. As well as constructing your own raised planter, why not have a go at building a DIY compost bin? Or, if you’re debating what to use your raised garden bed for, why not take inspiration from our article on the 10 best perennial plants?